Introduction
In your game development journey, there will be a time when you need to spawn objects like enemies or power-ups to your game world. This can be easily done with Unity’s Instantiate function, allowing you to spawn these objects with just one line of code.
Instantiation in Unity allows for the creation of content dynamically, which is essential for games that requires spawning of enemies, items, or obstacles in response to player actions or according to the game’s state.
In this post, we will see how you can spawn a Gameobject or a Prefab in Unity using instantiate function and also how to do the same using a Visual scripting graph.

Understanding Unity Instantiate function
Unity Instantiate function is used to spawn Prefabs or Gameobjects at any point in the game world. Unity requires the Gameobject, to be a Prefab or available in scene hierarchy in order to spawn them.
The instantiate function takes in 4 arguments and only one of them is mandatory. Here is the default syntax of Unity Instantiate function: Instantiate(Object, position, rotation, parent);
Now lets break it down for you.
- Object is the Prefab or Gameobject that you want to spawn. This input is mandatory.
- Position is the Vector3 position where you need to spawn the object. If no position is provided, the object is spawned at the location of the script Gameobject to which the instantiate function is added.
- Rotation is the Quaternion rotation of the spawned object. You can use
Quaternion.Identityto spawn the object with zero rotation. - Parent is the transform of the object that needs to be set as the parent of the spawned Gameobject.
What is Prefab in Unity?
Before we jump into Unity instantiate, you must know what a Prefab is?
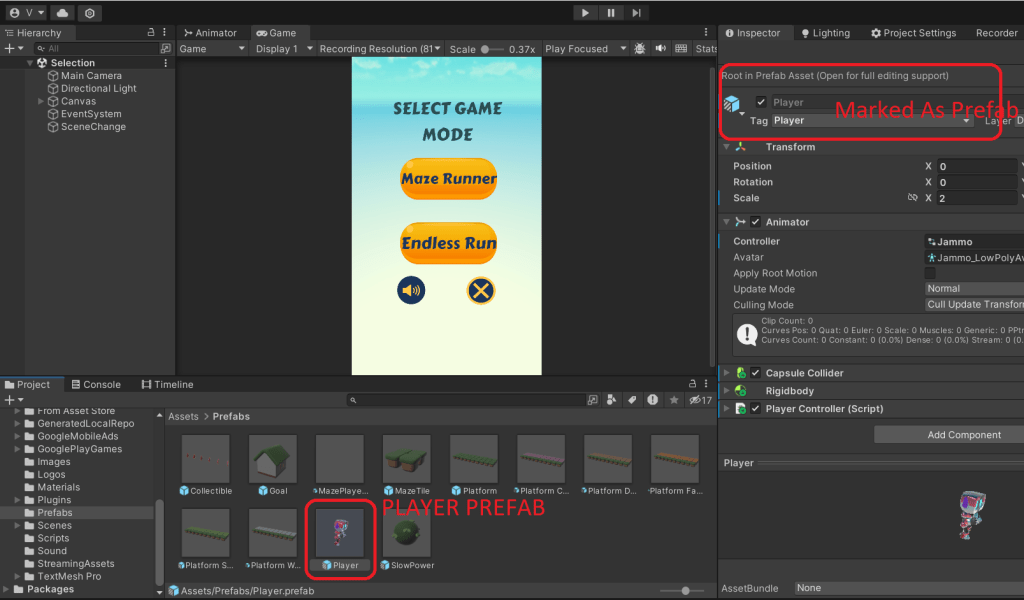
A Prefab in Unity is a Gameobject, which has already been customized and made ready to be deployed in a game scene. For example, if you have a character in your scene, you can set the position, rotation, scale, and other required components, and move it to the project window. You can use this Gameobject by directly moving it into the scene.
Here is how a Prefab would look in Unity.
Now let’s see, how to spawn the Prefab.
Instantiating a Prefab in Unity
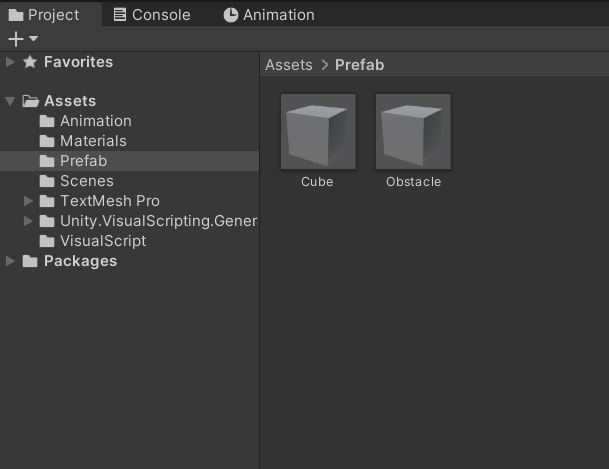
Step1: Create a Prefab in Unity
Open a new project in Unity. Create a new Gameobject in the Hierarchy window and add the necessary components. You can create empty Gameobjects, if you only need a script to be spawned but for this tutorial, let’s use the default Unity cube.
Drag and drop the cube from the hierarchy window to the project window. That’s it, you have your Prefab. Now you can delete the Gameobject from the hierarchy window.
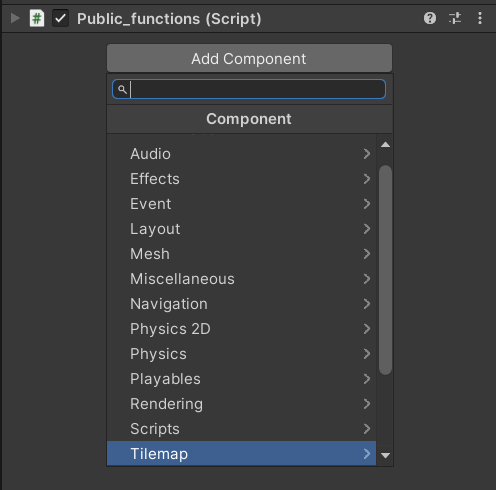
Step2: Adding Instantiate script to the scene
Create an empty Gameobject by clicking on the + sign in the Hierarchy window. Add a new script component and call it “InstantiateExample”. Open the script in Visual studio for editing. Copy and paste the below code.
This code will instantiate a GameObject at the location of the new Vector 3. If you want to spawn the Gameobject at different location, then you need to change the vector 3 value.
As we are not setting any quaternion rotation, the desired Gameobject will spawn with zero rotation.
using UnityEngine;

public class InstantiateExample : MonoBehaviour
{
  public Transform Prefab;
  void Start()
  {
     Instantiate(Prefab, new Vector3(2.0f, 0, 0), Quaternion.identity);
  }
}
Step3: Assign Prefab or Gameobject to the script
Select the script object in hierarchy view. Drag and drop the Prefab to the Prefab variable of InstantiateExample script in the inspector window as shown in the image below.
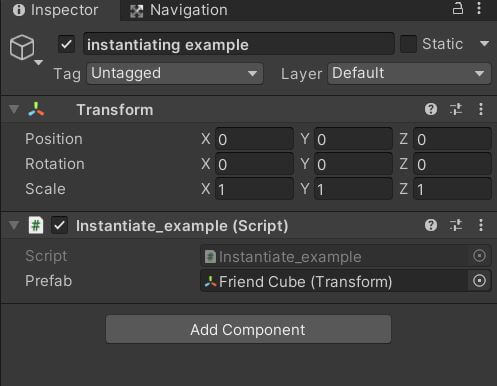
During run time, the Prefab will be spawned on to your game scene at start. Unity by default names the Gameobject as a clone of your Prefab. So, if your Prefab name is “Friend Cube” then Unity will name it “Friend Cube(Clone)”. The object may have a new look based on the parent object’s rotation and scale.
Customizing the Instantiate Function
Instantiate based on a condition
If you want to spawn the object based on a condition, like on press of space key or mouse click then you can shift the Instantiate function to the Update method and use an if statement as shown in the following example.
using UnityEngine;

public class InstantiateExample : MonoBehaviour
{
    public Transform Prefab;
    void Update()
    {
        if(Input.GetMouseButtonDown(0))  //Check if left mouse button is pressed
        {
            Instantiate(Prefab,new Vector3(2.0f, 0, 0),Quaternion.identity);
        }

    }

}
Instantiate prefab as a child of another object
Unity instantiate function, allows you to add a parent object as the fourth input to the function. If added, the spawned Gameobject is set as the child of the parent Gameobject.
using UnityEngine;
public class InstantiateExample : MonoBehaviour
{
  public Transform Prefab;
  public Transform Parent;

  void Start()
  {
     Instantiate(Prefab, new Vector3(2.0f, 0, 0), Quaternion.identity, Parent);
  }

}
Instantiate Prefab in Unity by name
You can reference the Prefab Gameobject and load it from the resource folder directly using Resources.Load().
The Prefab you are referencing should be inside the resource folder in the project window. This is not a good practice as its more performance extensive.
In the example below, we will try to spawn a Prefab called Player from the resource folder.
using UnityEngine;

public class InstantiateExample : MonoBehaviour
{

  void Start()
  {
     Gameobject newplayer=Instantiate(Resources.Load("Player", typeof(GameObject))) as Gameobject;

  }
}
Giving a custom name to the Instantiated Prefab
By default, any Gameobject that is instantiated in Unity is given the name “Prefab_name(Clone)”. If you instantiate multiple copies of Prefab then they will be named “Clone1”, “Clone2” and so on. The name of the cloned object doesn’t make any difference unless you want to access it using a name.
If that is the case then you can assign the instantiated Prefab to a Gameobject and then set a name to the Gameobject.
Here is the sample code to set the name of the instantiated object to “Myobject”.
mySpawnedObject=Instantiate(Prefab,transform.position,Quaternion.identity);
mySpawnedObject.name="MyObject";
Real World Example
Instantiating a Projectile in Unity
The only difference between instantiating a Gameobject and instantiating a projectile is, you need to add a force to the instantiated projectile so that it will move. The best way is to create an empty object and place it where you want the projectile to spawn.
For example, if you are making a rocket projectile for a rocket launcher then you need to place this empty Gameobject at the tip of the rocket launcher. Here is how to do it.
- Create an Empty Gameobject and call it “ProjectileSpawner”.
- Add a Script to it called “SpawnProjectile”.
- Create a projectile Prefab with a Rigidbody component. We need the Rigidbody component to add force to the projectile.
- Add the below script to instantiate the projectile and add force to it.
using UnityEngine;

public class SpawnProjectile : MonoBehaviour
{
    public GameObject Projectile;
    GameObject myProjectile;
    Rigidbody rb;
    float forceMagnitude=5;

    void Start()
    {
        myProjectile=Instantiate(Projectile,transform.position,Quaternion.identity);
        rb=myProjectile.GetComponent<Rigidbody>();
        rb.AddForce(transform.forward*forceMagnitude,ForceMode.Impulse);

    }

}
Assign your projectile to the script and you are ready to launch a projectile.
You can use Components for Unity Instantiate (Instantiate hack)
To access the Rigidbody of the spawned Gameobject in the above example, we are instantiating the Prefab, assigning it to another Gameobject and using the GetComponent() to get the Rigidbody. Then we apply force to it.
There is a simpler way to do this. You can instantiate the Gameobject by passing the Rigidbody component in place of the Prefab. This way you need not use the GetComponent() function and Unity instantiates the Gameobject by default. This is more performance efficient than the conventional way.
using UnityEngine;

public class SpawnProjectile : MonoBehaviour
{
    public Rigidbody projectile;
    Rigidbody spawnedProjectile;
    float forceMagnitude=5;

    void Start()
    {
        spawnedProjectile=Instantiate(projectile,transform.position,Quaternion.identity);
        spawnedProjectile.AddForce(transform.forward*forceMagnitude,ForceMode.Impulse);

    }

}
How to Instantiate at random positions in Unity
To instantiate Gameobjects at random positions, you need to generate random numbers and create a new vector 3 with it. We will keep the Y value fixed and randomize the X and Z values.
The below script uses Random.Range to generate these values and will spawn the Gameobject at random positions when the mouse button is clicked.
using UnityEngine;

public class InstantiateRandom : MonoBehaviour
{
    [SerializeField]GameObject instantiateObject;
    float xPos;
    float zPos;
    float minPos=0;
    float maxPos=10;
    void Update()
    {
        if(Input.GetMouseButtonDown(0))
        {
            xPos=Random.Range(minPos,maxPos);
            zPos=Random.Range(minPos,maxPos);
            Vector3 pos=new Vector3(xPos,0,zPos);
            Instantiate(instantiateObject,pos,Quaternion.identity);

        }

    }

}
Instantiate using visual scripting (Without code) in Unity
If you are not comfortable using code in Unity, then you can also use visual scripting to instantiate a Gameobject. Follow the steps below to spawn a Gameobject without code.
Create a flow graph
- Create a new empty object in the hierarchy window.
- Name it as “InstantiateGraph”.
- Go to inspector window and click add component.
- Add a Script machine component.
- Click new to create a new graph.
- Name it as “InstantiateExample”.
Create the logic
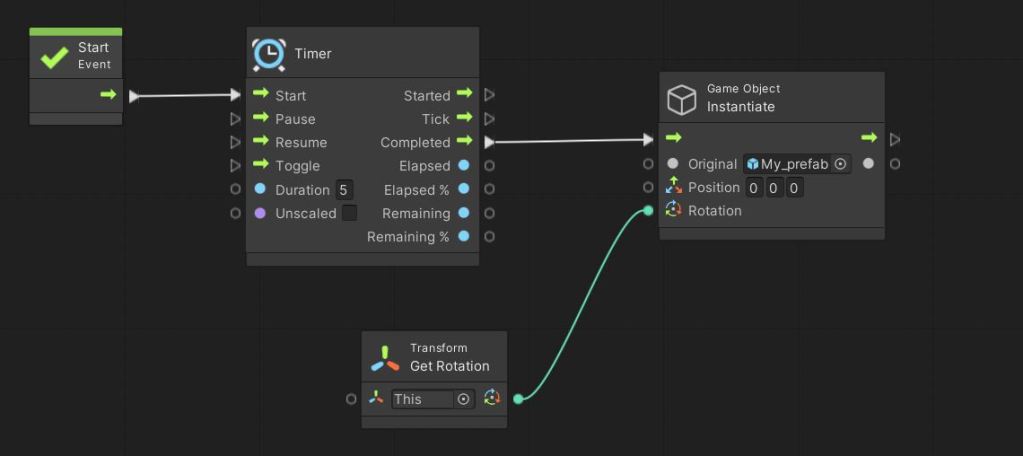
We are going to instantiate a Prefab called “My_prefab” after 5 seconds of game start.
- Add a timer, get rotation and an instantiate Gameobject node.
- Set the timer duration to 5 seconds.
- Connect Start event to timer start and timer completed to instantiate.
- Set the Gameobject to My_prefab in the instantiate node.
- Get the rotation of the script’s Gameobject using get rotation node, and connect it as input to the rotation parameter of the instantiate node.
- You can change the position where you want the Prefab to be instantiated in the instantiate node.
Play the game and the object should spawn after 5 seconds of game start.
Common Pitfalls and Troubleshooting
Here are some common mistakes and errors that developers encounter while using Instantiate.
Common Mistakes and How to Avoid Them
- Overusing Instantiate and Destroy: Frequently creating and destroying objects can lead to performance issues, especially on mobile devices. Solution: Implement object pooling, where objects are reused instead of being constantly destroyed and recreated.
- Ignoring the Instantiate Position: Spawning objects without careful consideration of their position can lead to objects appearing in unexpected places or clipping through the environment. Solution: Always specify the position and orientation when instantiating objects, and consider using parent objects to manage groups of instantiated objects effectively.
- Forgetting to Set the Parent: Instantiating objects without setting a parent can clutter the scene hierarchy and make management difficult. Solution: Use the overload of
Instantiatethat allows you to specify the parent transform, keeping the hierarchy organized. - Broken Prefabs: Using
Instantiatewith Prefabs that are not properly set up or are missing components can result in runtime errors. Solution: Ensure your Prefabs are correctly prepared and contain all necessary components before instantiation.
Debugging Tips and Resolving Frequent Errors
- NullReferenceException: This error occurs when trying to instantiate a null object. Solution: Verify that the object you’re trying to instantiate is assigned in the inspector or properly loaded before instantiation.
- Troubleshooting Scripts on Instantiated Objects: Scripts attached to instantiated objects may not run as expected due to incorrect initialization or order of execution. Solution: Ensure that any initialization code runs after the object is instantiated, and consider using Unity’s
StartorAwakemethods for setup tasks.
When and when not to use Unity instantiate
Instantiate is really useful but when using it to spawn multiple objects can fill the memory and affect game performance. Let’s see what are the ideal conditions when you can use instantiate.
- Spawn single characters that stay throughout the game like the player Gameobject.
- Objects that are limited in number like ammo, power-ups, etc. which are destroyed later.
- For effects on objects like a fire that dies down after a few seconds.
Remember to destroy the object after it’s no longer needed otherwise it will add up the game memory and cause the game to freeze. So, it’s better not to use instantiate when multiple spawn is required. In that case, you can create an object pool and make them active when required.
For example, you can add a bullet Gameobject to the scene and set it as inactive. When the gun fires set the Vector3 position of the bullet to the front of the gun and make the bullet object active. When the bullet hits a surface then deactivate it rather than destroying it. This will reduce the memory load caused by the instantiate function. You can learn about colliders to know when to deactivate the Gameobject.
That’s it for this tutorial, try this out and let us know if you have any questions. For the next tutorial, we learn about Camera in Unity.