In this tutorial, we will learn to sync text in with audio as shown in the video below.
We will be using the Unity asset Audio-Text synchronizer for this purpose.

Step 1: Get the asset
- Go to Audio text synchronizer assets on the Unity asset store.
- Login using your Unity Id and add Audio text synchronizer to your assets.
- Go to Unity editor and open package manager.
- Find Audio text synchronizer and import the asset into your project.
Step 2: Add Audio clip to timing editor.
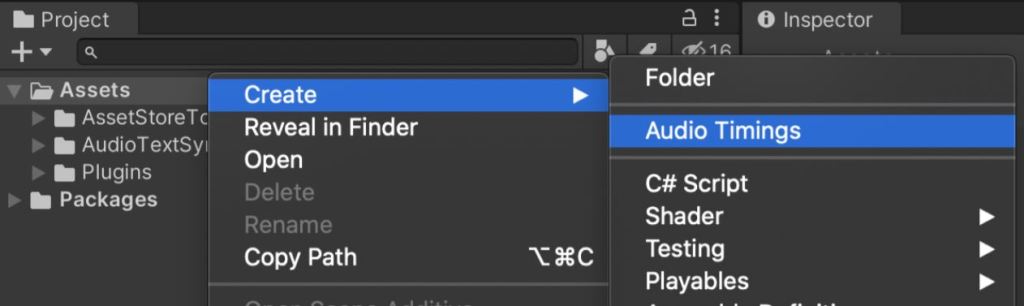
- Go to Projects window.
- Click create>Audio Timing.
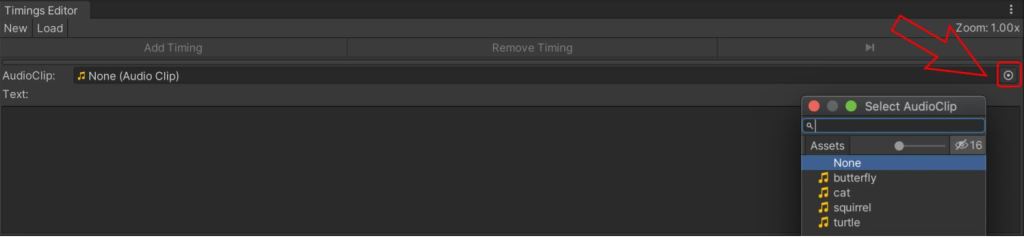
- You should see a timing editor in the screen.
- Add your audio clip to the timing editor.
Step3: Add time segments
Since the audio will not be evenly distributed. It’s better to create segments in the audio clip and add the respective text to it.
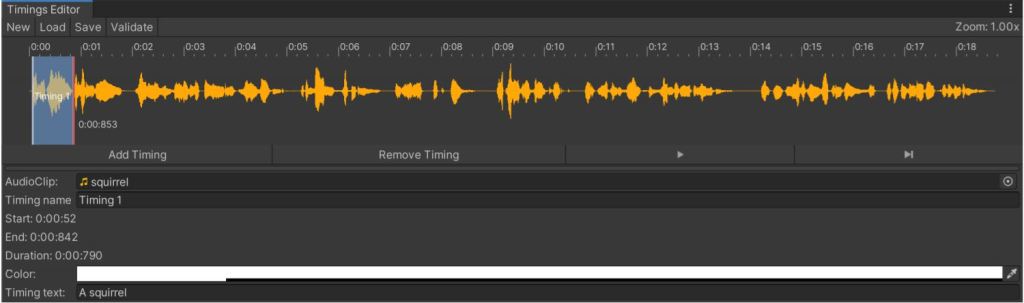
- Double Click on the timeline where you want to add the timing.
- Click add timing at the bottom of the Timings editor.
- You can see a segment is created and highlighted.
- You can hold Shift key to move this segment and move the borders to adjust the duration.
- Add the text that in the audio to the segment.
- Press the play button in the Timings editor and see if the text is in sync.
- Keep adding segments and enter text for the complete audio file.
- After completing save the audio asset using the save option in the Timings editor.

Step4: Display text effect
- Create a new text object.
- Create a new audio source and add the audio clip to it. Make sure the clip is set to not play on awake.
- Create an empty game object and name it Voiceandvisualtextsynchronizer.
- Add Text Synchronizer script to Voiceandvisualtextsynchronizer.
- Add the text to the gameobject parameter.
- Select property as text.
- Drag and drop the timing asset you created above into the Phrases asset parameter.
- Add the audio source.
- In the effect field add the component to which the Text synchronizer script is added.
- To start use Textsynchronizer.Start()
- To stop use Textsynchronizer.Stop()
- Note that the audio source must be playing to start the text synchronizer.
