Parallax background is used in side scroller or vertical scroller games where you get the effect of depth and movement in background. This can be done by having a few layers of background and a simple script to move the background based on player or camera movement.
The first requirement for Parallax background are the images. Your images should be created in layers and should look good stacked on top of each other. The number of layers can be anything more than one depending on your requirement.

You can download free images for Parallax background from Unity asset store. For the purpose of this tutorial, I have downloaded this free background from Unity asset store.
Unity Parallax Asset
If you don’t like to write code and want a readymade solution for Parallax then you can buy our asset from itch (It will be available on Unity asset store soon). It supports both horizontal and vertical background scrolling up to infinite layers. You can set it up with just a few clicks.
How to use the Parallax asset
Steps to Create a Parallax effect
Creating a Parallax layer
Create an empty gameobject and name it as Parallax_layer.
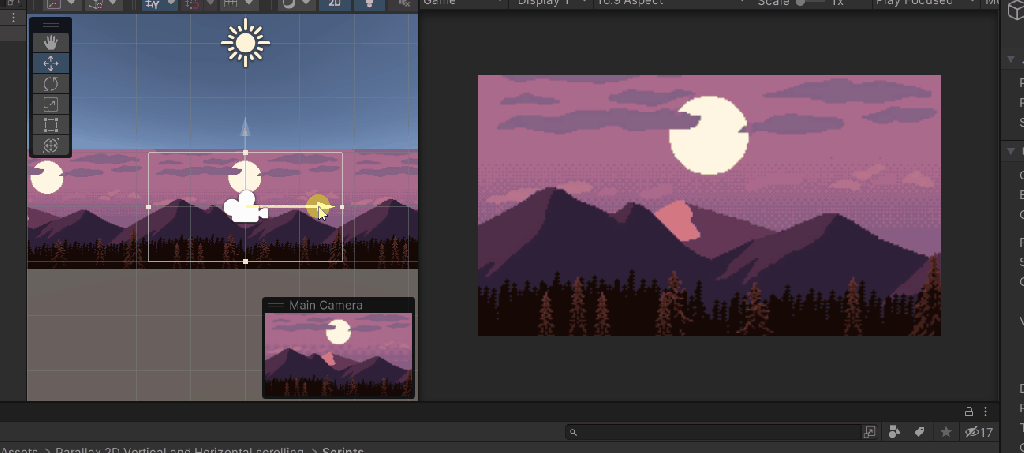
Drag and drop your first background image as child of the Parallax_layer. Adjust the image size by changing the pixel per unit value so that the background image fits into the camera view. Set the layer order in the sprite renderer.
Duplicate the image two times and move them to the sides as shown in the image below.
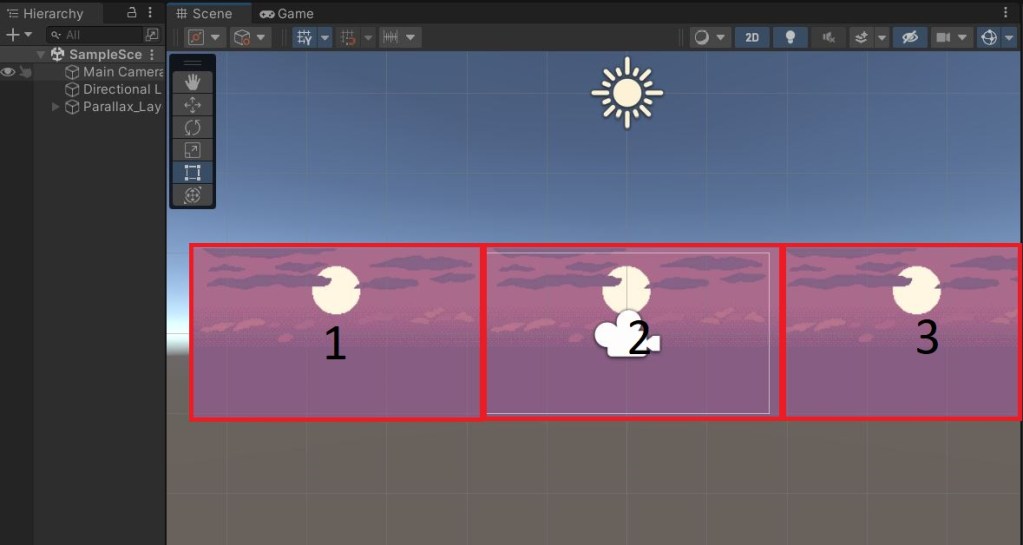
All the images will be children of Parallax_layer. The reason we need three images is when you move the camera there will be a small blank before the image will replicate itself. We can cover the blanks using these images.
Making the image move with Camera
We want this image to move relative to the camera speed. So, we will get the camera, start position of the image and the Parallax value.
Once we have the variables. We can just multiply the camera’s x position with Parallax value and add it to the start position of the image. Depending on the Parallax value the image will move with camera.
using UnityEngine;

public class Parallax : MonoBehaviour
{

    public Camera your_camera;
    public float parallax_value;

    Vector3 startposition;
    // Start is called before the first frame update
    void Start()
    {
        startposition=transform.position;

    }

    // Update is called once per frame
    void Update()
    {
        Vector3 relative_pos=your_camera.transform.position*parallax_value;
        relative_pos.z=startposition.z;
        transform.position=startposition+relative_pos;

    }
}
Now you have a moving background. The only problem here is if your parallax background is not equal to one then at some point the background is going to disappear. So, we need to move the background after the camera has moved a distance greater than the length of the image.
So, let’s update the code to get the distance moved by the camera and if its greater than the length of the image then we shift the startposition of the image by length of the image. Here is the final script
using UnityEngine;

public class Parallax : MonoBehaviour
{

    public Camera your_camera;
    public float parallax_value;
    Vector2 length;

    Vector3 startposition;
    // Start is called before the first frame update
    void Start()
    {
        startposition=transform.position;
        length=GetComponentInChildren<SpriteRenderer>().bounds.size;
    }

    // Update is called once per frame
    void Update()
    {
        Vector3 relative_pos=your_camera.transform.position*parallax_value;
        Vector3 dist=your_camera.transform.position-relative_pos;
        if(dist.x>startposition.x+length.x)
        {
            startposition.x+=length.x;
        }
        if(dist.x<startposition.x-length.x)
        {
            startposition.x-=length.x;
        }
        relative_pos.z=startposition.z;
        transform.position=startposition+relative_pos;

    }
}
Creating other layers
Now you have a Parallax layer. Drag and drop the Parallax layer on to your project folder to make it into a prefab. Now you can drag and drop the prefab to your scene as many times depending on the number of layers you want.
You need to change the images of each layer, change the layer order and set different Parallax value for each layer.
Now hit play and you have a beautiful parallax effect.