Many Unity users are still using the old input system for their games. The main reason being the new input system is not properly documented by Unity. The New Unity system has lots of advantages over the old system when it comes to setting up multiple controllers and input actions. In this tutorial, we will try to understand what is different in the new Input system and how to use it. I will be using Unity 2021.1.13 for this tutorial.
Understanding terminologies in the new Input System
Actions
Actions are customizable parameters that define the player’s movements in your game. For example, move and jump. You can define new actions with any name of your choice. You can create any number of actions based on your requirement and input device type.

Bindings
Bindings are the parameters that define how an Input action is linked to the device. You can link any action to any button of the device. For example, you can link the Jump action to the spacebar of your keyboard using the Binding parameter.
Action maps
Action map is the collection of input actions. You can have all your input actions inside one Action Map. Think of it as a folder to save all your input actions.
Control Scheme
Control scheme lets you have multiple control methods for the same Input actions. This way you can allow the user to switch between the controls, based on their requirement.
Input Action Asset
Input action assets contains all your Input action data like Action Maps, Actions, Bindings and control scheme. You can create a new Input action asset by right clicking on the project window and select Input Actions.
With all the basics down, now let’s try to create simple input and use in the code. You can either watch it as a video or read the tutorial.
Video Tutorial
How to install the new Input system in Unity
By default, a new project in Unity works with the old Input system. If you want to use the new input system you have to install it from the package manager.
- Go to Windows> Package Manager.
- Search for Input system
- Click on Install
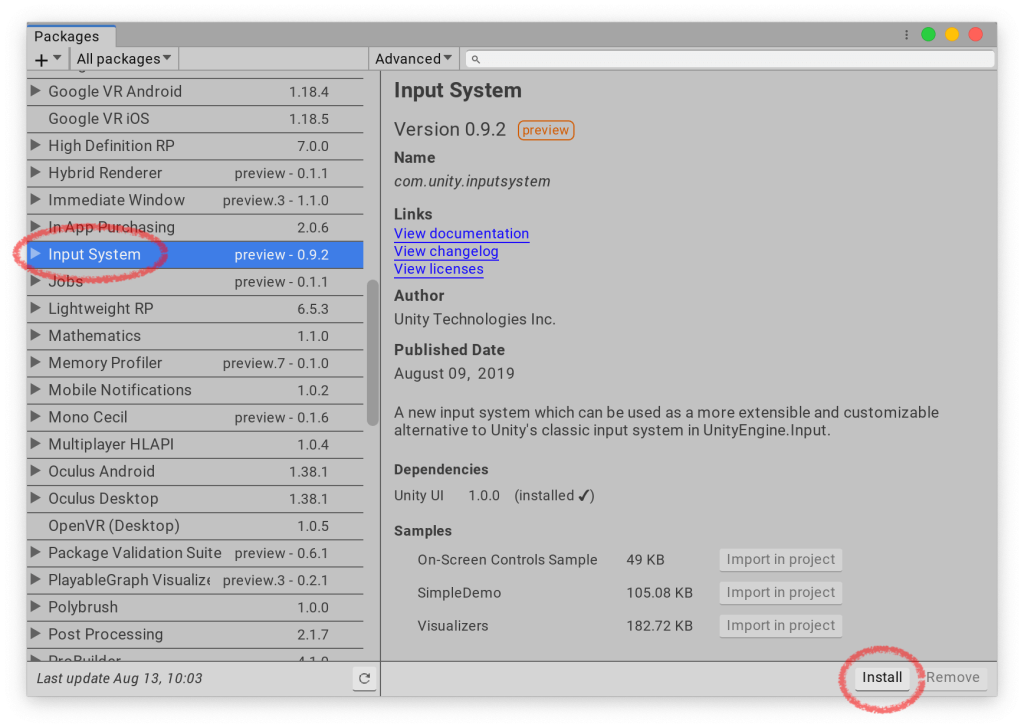
- Once you have installed the new input system you will see a dialog box asking to disable the old input system. Click yes.
- This will restart your Unity Editor.
- After the restart, you are all set to use the new Input system.
Creating a New Input Asset
The first step to use the new Unity Input system, is to create a New Input Asset.
To create a new input asset, follow the steps below
- Right Click on the project window>Create>Input Actions.
- Give it a name and press Enter.
- Now you should see an Input Action File in your project folder.

Checking your Device in Input debugger
Input debugger is similar to Windows device manager. Any new device you connect to your computer should show up here. Otherwise, you will not be able to configure it in Input actions.
Open Input debugger by going to Window>Analysis>Input debugger.
You can also add a custom device. We will cover that in detail in a different tutorial.
You can double click on the device to show the buttons and raw readings from the device. If your device is displayed in the Input debugger, we can move on to the next step of configuring the input action.

Creating a new Action
Double click on the Input asset we created earlier to open up the Input Actions Configurator.
You should see a Window like the one in the image below
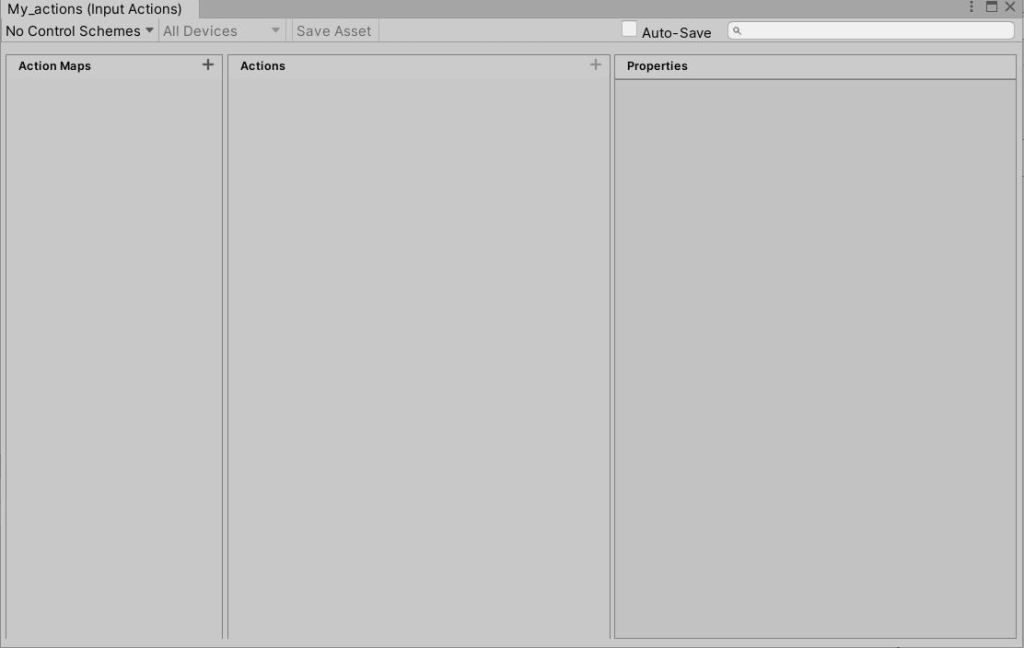
Before creating a new action, you need to create a new Action Map.
- Click on the Plus sign near the Action Maps and create a new Action Map.
- Give it a name. You should see a new Action created by default. You can double click on Action and change its name.
- Let’s name it Jump.
- Select the jump action and set the Action type to Button. In case you want to take a vector 2 as input (in case of gamepad joystick) you can select the Action type as Value and then select the Control type as the value of the Input.

Add Binding to an Action
Click on the small arrow near the action, this will bring down the Binding option. If you don’t see the arrow, click on the plus sign on the right of the action to add a new Binding.

You should see some options on the properties tab.
You have to add a path to the Binding. The easiest way is to click on the drop down in the path dialog box and click on listen.
Press the button you want to configure for jump. Let’s press the spacebar. You should see the spacebar button in the window. Select it. Now you have configured your space key to the Jump action.
If you need to add another device to the same action, you can just add a new binding and follow the same process to bind the key with your Input action.

Now you have completely configured a new Input action.
Access the Input action using code
This part is where you will reference the input action to get your player to jump. Before proceeding with your player code, you need to generate a C# file for your Input Action asset.
- Select your Input Action asset file and go to the inspector window.
- Check the Generate C# class and click Apply.
- Now you should see a C# script with the same name as your Input action asset.

- In your player code, where you want to use the Input action add the name space
using UnityEngine.InputSystem. - Create an object to reference your Input action script.
- Enable your Action map and subscribe to the button press event.
Here is an example script for the same.
using UnityEngine;
using UnityEngine.InputSystem;

public class PlayerController : MonoBehaviour
{
    // Start is called before the first frame update
    void Start()
    {
        TestControl newInput=new TestControl();
        newInput.Testactionmap.Enable();
        newInput.Testactionmap.Jump.performed+=PlayerJump;


    }

    private void PlayerJump(InputAction.CallbackContext obj)
    {
        Debug.Log("Button Pressed");
    }
}
When the Space bar is pressed the PlayerJump() will be called. You can put your jump logic inside the function.
Now that we understand how to work with the new input system here are some more tutorials that you should try out