Unity does not have an option to add Volumetric clouds to your scene if you are using the SRP or URP pipeline. In case of HDRP, Unity has added support for volumetric clouds that you can enable them with just a few clicks. In this tutorial, we will see how to create simple clouds using shader graph for URP and SRP pipelines.
Video Tutorial
Creating a new Shader Graph
If you are totally new to shader graph then check out our tutorial on getting started with shader graph to install the shader graph package.

Right click on the project window>Create>Shader Graph>Build-In (or URP)>Lit. If you don’t want the clouds to be affected by light then you can select Unlit.
Let’s name it Cloud shader. Double click the cloud shader to open the shader graph editor. Create a material from the shader and assign it to a plane, so that we can preview it.
Adding the Cloud Pattern
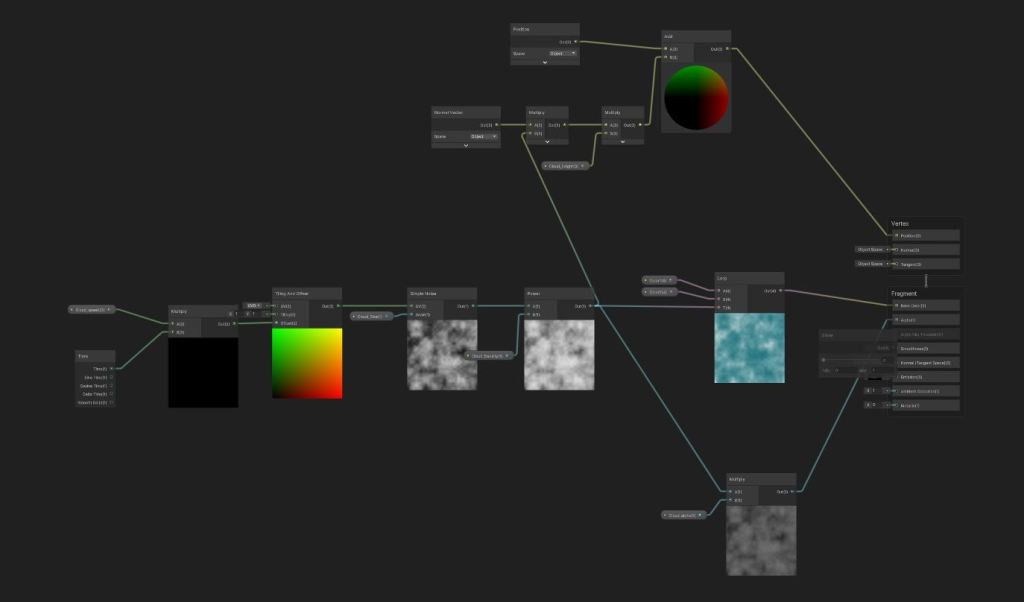
We are going to use Simple noise to get the cloud pattern. So go ahead and add a Simple Noise node to your shader graph. By adjusting the scale of the noise node, we can change the size of the cloud. So, let’s create a float property called Cloud_size and connect it to the scale input of the Simple Noise node.
Next, we need a way to control the density of the cloud. We can do that with the Power node. Add a power node to the graph and create another float property called Cloud_density. Connect the output of the Noise node and Cloud_density property to the power node.

Adding color and Transparency to Cloud shader
To add color, we can just multiply the output of the Power node with a color and connect it to the base color node on the fragment block. But We can achieve a better effect using the Unity lerp function. This way you can have different colors for the light and the dark part of the noise.
Add a lerp node and create two color properties. Let’s call them Color1 and Color2. Make sure you set the Color mode to HDR. Connect the Power node’s output to the T input of lerp node and connect the color properties to the A and B input. Connect the output of the Lerp to Base color.
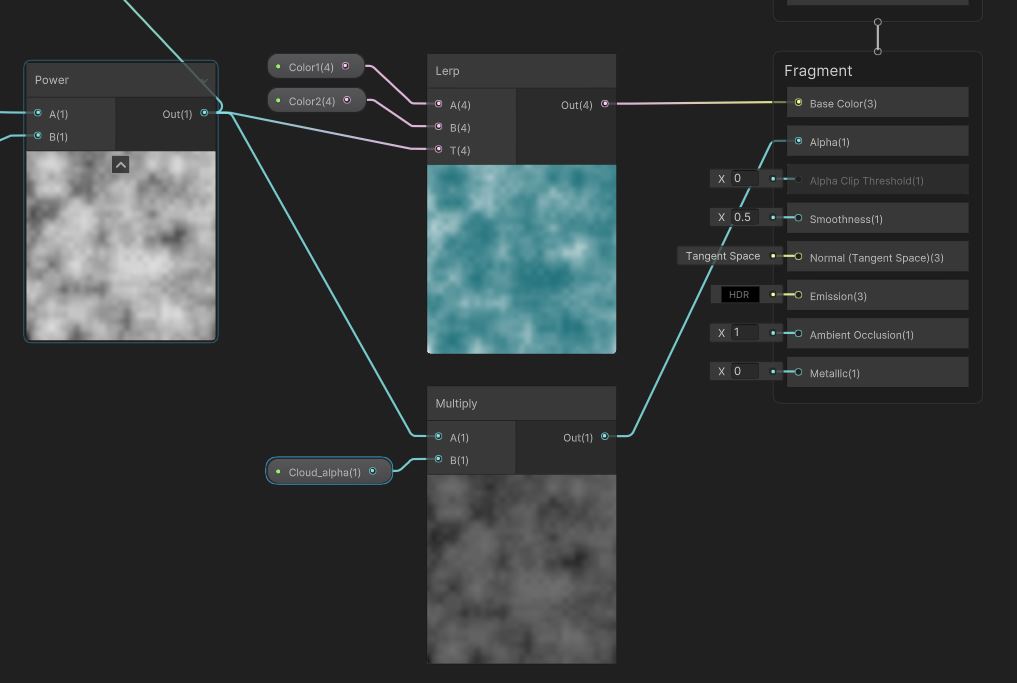
Go to the Graph inspector >Graph settings. Select the surface mode as transparent. This will add an Alpha node to the Fragment block. Take the output of the Power node and multiply with a property Cloud_alpha and connect it to the Alpha node.
Making the Cloud Move
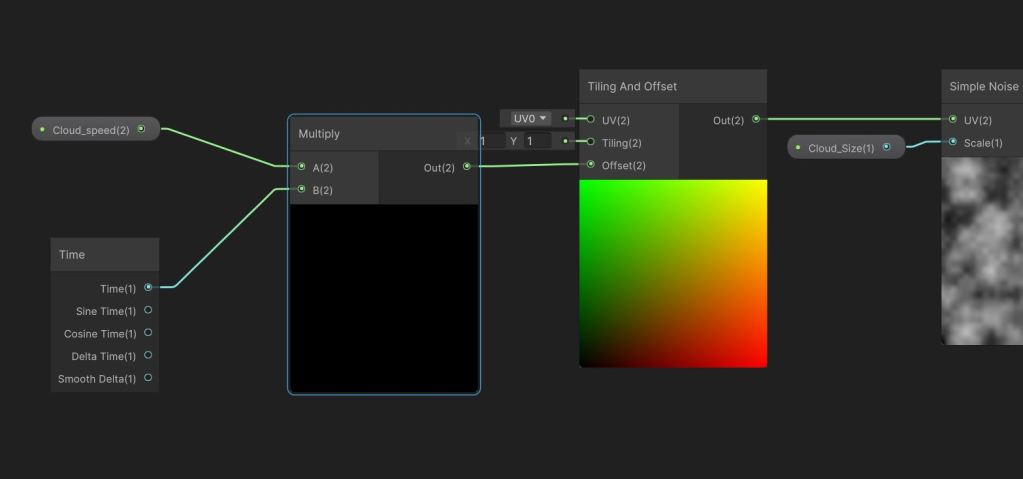
We will be using the tiling and offset node to achieve this. You will need a property to control the amount of offset which in turn will control the cloud’s movement speed.
Create a Vector2 property called Cloud_speed and multiply it with the time node. Connect the output to the offset of the Tiling and Offset node. Now connect the output of the tiling and offset node to the UV of Simple Noise node.
Now you should have a cloud pattern that you can modify using the properties and create a cloud. If you want the cloud to be visible from both sides then go to the graph inspector>Graph settings and set render face to Both.
Play around with the properties and once you are satisfied, we can go to the next step.
Making the Clouds Volumetric
We can’t use the regular Unity plane to create volumetric clouds. We need a sub divided surface to achieve this. If you comfortable using Blender or other modelling software then you can create a simple subdivided plane using them. But if you are not, don’t worry you can do the same inside Unity.
You will need a package called pro builder. Go to Window>package manager and search for Pro builder under Unity registry. Install the package.
Once you have installed Pro builder go the menu bar on the top and click on tools>pro builder>Pro builder window.
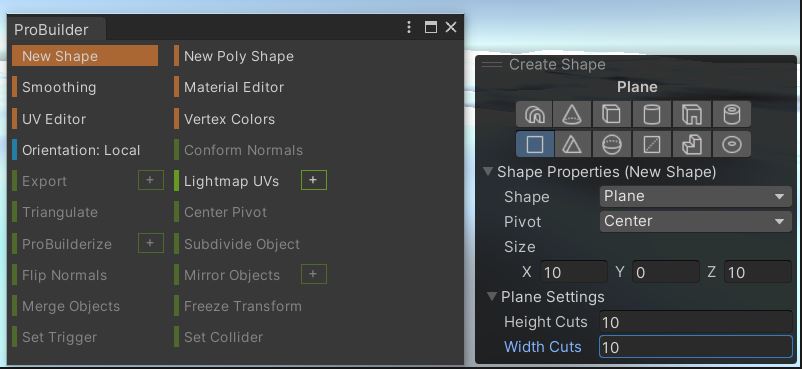
This will open the Pro builder window for you. Click on New Shape. In the Create shape window, select the shape as plane and set the heigh cuts and width cuts to 10. This will create a sub divided plane. Hold shift and left click on your scene window to place the plane.
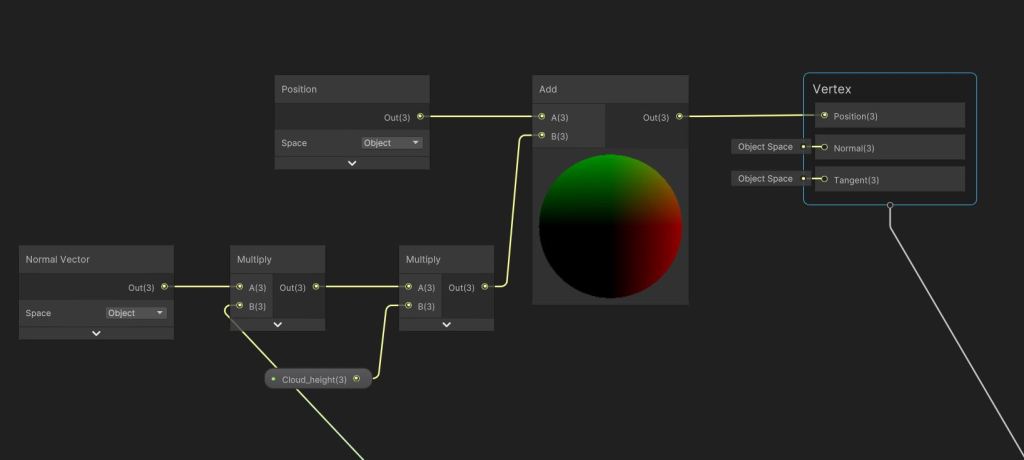
Adding Noise to Plane vertex
Multiply the power node’s output with a normal vector node. Multiple the output with a new Vector 3 property called Cloud_height. Add the output to the vertex position and set it to the position node in Vertex block. You need to set the Space type of Normal node and Position node to Object.
Save the asset and go back to Unity editor. Play around with the settings until you have the right cloud for your game.
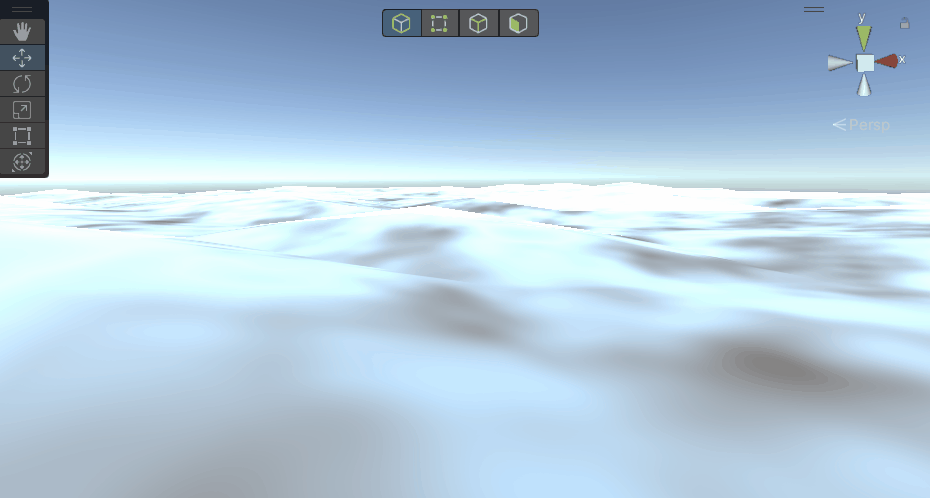
This is how the final cloud looks like