What is Unity Lerp
Lerp in Unity represents the equivalent of mathematical linear interpolation. Using Lerp, you can get any point between positions, similar to the methods used in linear interpolation for curve fitting.
To understand it better Let’s say we have a position X and a position Y. Now if you need the midpoint of both the position then you can use the Unity Lerp function and pass 0.5 as the third input to get the midpoint. Similarly, you can pass any value between 0 and 1 to get the positions between your start and the end points.

Developers majorly use lerp methods with position and rotation. In all other cases, they use it with Mathf to calculate the interpolation value. In Unity, one can use Lerp with Vector3, Vector2, Quaternion, Mathf, Color, and Material.
To slowly change from a start value to an end value using Lerp, one should increment the third input of Lerp slowly from 0 to 1.
In this tutorial, we will see how to use the Lerp function in different ways in your game.
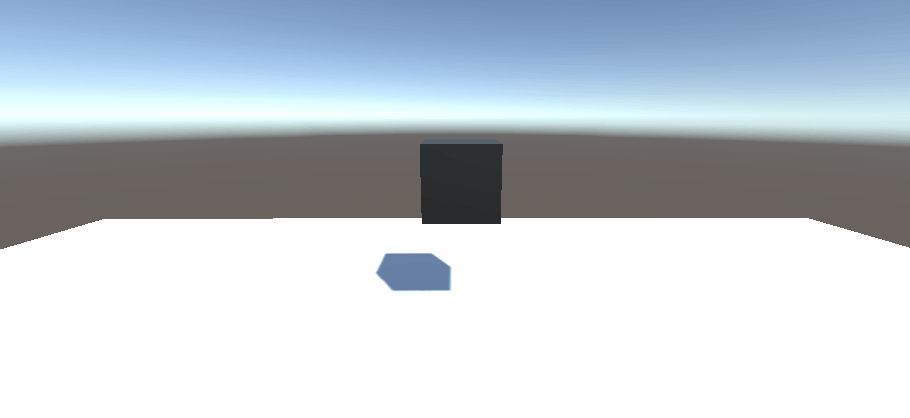
Unity Lerp position Using Vector3.Lerp
The Vector3.Lerp function takes in 3 arguments. The first one is the start position, second is the end position and the third is the interpolation variable.
The third argument is modified to change the position slowly inside the void update() function. To make the movement smooth you can use Time.deltatime to increment the third input.
Here is the default Lerp syntax for Vector3
Vector3.Lerp(Start position, End position, Interpolation value);
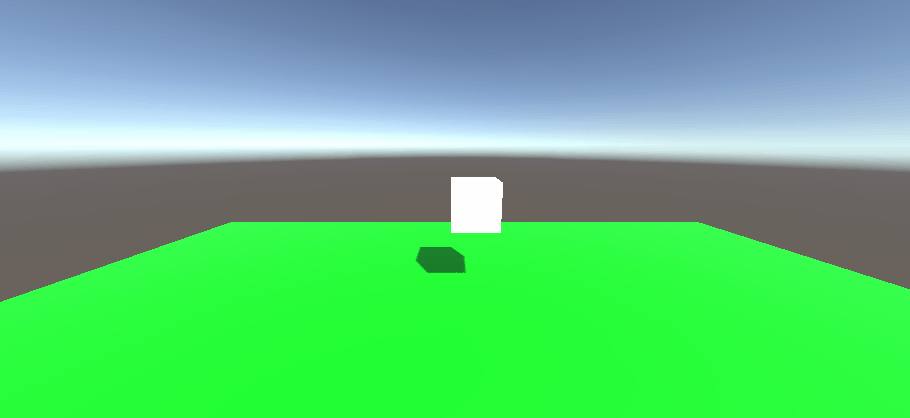
As in the above gif you can the object move from one position to another slowly using the Lerp option. You can use the same code for 2D games by replacing Vector3 with Vector2
Here is the code to lerp position in Unity. The below code will move the object from start position to the end position in a duration of 5 seconds.
using UnityEngine;

public class Unity_lerp : MonoBehaviour

{

  Vector3 start_pos;

  Vector3 end_pos;

  Vector3 ofset= new Vector3(5,0,0);

  float timer=0;

  // Start is called before the first frame update

  void Start()
  {

    start_pos=transform.position;

    end_pos=transform.position+ofset;

  }

  // Update is called once per frame

  void Update()
  {

    transform.position=Vector3.Lerp(start_pos,end_pos,timer/5);

    timer+=Time.deltaTime;

  }

}
Unity Lerp rotation Using Quaternion.Lerp
Same as Vector3, Lerp can be used with Quaternion to rotate an object in Unity. Let’s try to rotate a cube from the initial position to a certain angle.
Here is the code to rotate a game object slowly over time. We will assign the start rotation and end rotation in the Start() and then use the Lerp function to rotate it slowly inside the Update().
using UnityEngine;

public class Unity_lerp : MonoBehaviour
{

  Quaternion start_pos;

  Quaternion end_pos;

  float timer=0;

  // Start is called before the first frame update

  void Start()
  {

    start_pos=transform.rotation;

    end_pos=Quaternion.Euler(90, 0, 90);

  }
  // Update is called once per frame

  void Update()
  {

    transform.rotation=Quaternion.Lerp(start_pos,end_pos,timer/5);

    timer+=Time.deltaTime;

  }

}
Changing Color using Lerp
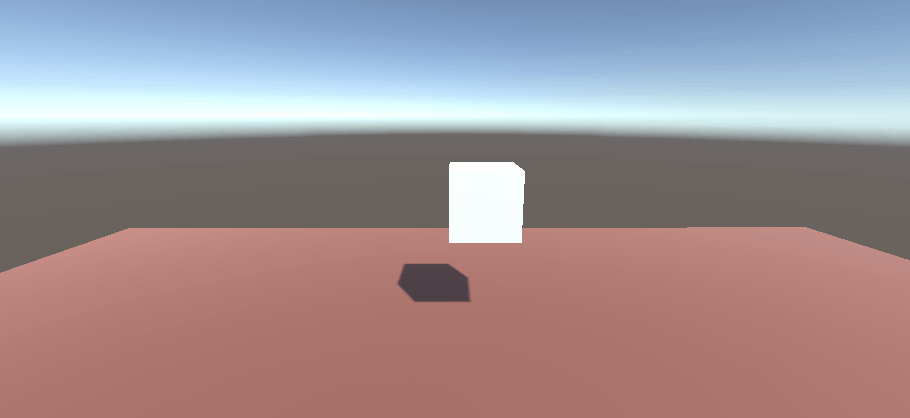
You can change the color of a game object using script, but if you want to change it slowly from one color to another then you can use Lerp. You can change the color of the material using Color.Lerp similar to position and rotation. Here is an example. Let’s change the color of the cube from black to white.
Here is the code to slowly change the color of the cube from black to white using lerp
using UnityEngine;

public class Unity_lerp : MonoBehaviour

{

  Renderer col_rend;

  float timer=0;

  void Start()

  {

    col_rend=GetComponent<Renderer>();

  }

  // Update is called once per frame

  void Update()
  {

    col_rend.material.color= Color.Lerp(Color.black, Color.white,timer/5);

    timer+=Time.deltaTime;

  }

}
Making an object fade using color Lerp
You can also make the object fade by changing the alpha of the color class.
To completely fade an object the shader rendering mode must be set to fade. If it’s set to opaque your fade code will not work.
This method will work with shaders with user settable rendering mode.
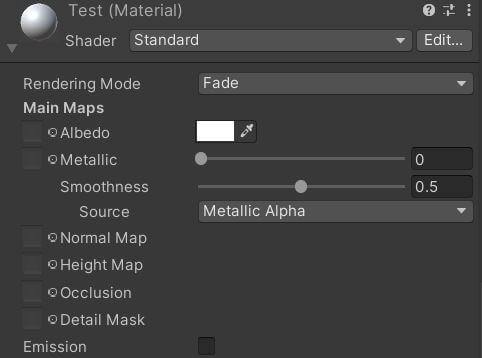
If you don’t want your object to fade completely then you can set the rendering mode as transparent.
Here is the code for the same
using UnityEngine;

public class Unity_lerp : MonoBehaviour

{
  Renderer col_rend;
  Color start_col;
  Color End_col;
  float timer=0;

  void Start()
  {
    col_rend=GetComponent<Renderer>();

    start_col=col_rend.material.color;

    End_col= start_col;

    End_col.a=0f;

  }
  // Update is called once per frame

  void Update()
  {
    col_rend.material.color= Color.Lerp(start_col, End_col,timer/5);

    timer+=Time.deltaTime;
  }

}
Using Mathf to lerp variables
Unity Lerp float
To Lerp a float in Unity you have to use the Mathf function. The syntax of Mathf.Lerp is very similar to other Lerp functions in Unity.
Let’s try to increment a number from 0 to 10 using Mathf.Lerp.
Our Start value will be 0 and the end value will be 10. Let’s increment the interpolation value using the Unity Time function.
Here is the sample code to Lerp a float from 0 to 10 in 5 seconds.
using UnityEngine;

public class Unity_lerp : MonoBehaviour
{

  float start_value=0f;
  float end_value=10f;
  float output;

  void Update()
  {
    output=Mathf.Lerp(start_value,end_value,Time.time/5);

    Debug.Log(output);

  }

}
Slowly Zoom camera using Mathf.Lerp
You can change the camera’s field of view using the Lerp function. Alternatively, you can also move the camera towards the target using vector3.Lerp
Let’s use the above example to Lerp a float and change the camera’s field of view.
Here is code to zoom the camera by modifying the field of view using Lerp.
using UnityEngine;

public class Unity_lerp : MonoBehaviour
{
  float start_value=80f;
  float end_value=50f;

  // Update is called once per frame

  void Update()
  {

    Camera.main.fieldOfView=Mathf.Lerp(start_value,end_value,Time.time/5);

  }

}
Unity Lerp Vs Slerp
This is not a Unity Lerp function. It’s the cousin of Lerp and it’s called Slerp. Both these functions work in the same way. The only difference is Slerp considers the vectors as direction rather than points in space.
Teh code below moves the game object in a curved path from the start position to the end position.
using UnityEngine;

public class Unity_Slerp : MonoBehaviour

{

  Vector3 start_pos;
  Vector3 end_pos;
  Vector3 ofset= new Vector3(5,0,0);
  float timer=0;

  // Start is called before the first frame update

  void Start()
  {

    start_pos=transform.position;

    end_pos=transform.position+ofset;

  }

  // Update is called once per frame

  void Update()
  {

    transform.position=Vector3.Slerp(start_pos,end_pos,timer/5);

    timer+=Time.deltaTime;

  }

}
Fixing Lerp slow down at the end
You will not have this problem with all the above codes in this blog post but if you have taken a Lerp code online from other sources you will note that the Lerp value slows down as it approaches the end.
This happens if you update the start value in your Lerp function. The start value should remain fixed and only the interpolation value needs to change to get a linear change.
For example, in the first demo we updated the transform position based on the Lerp value but we did not set the start position to transform position in every Update.
This code will not slow down at the end
void Update()

  {

    transform.position=Vector3.Lerp(start_pos,end_pos,timer/5);

    timer+=Time.deltaTime;

  }
This code will slow down at the end because we update the start position every frame.
void Update()

  {

    start_pos=transform.position;

    transform.position=Vector3.Lerp(start_pos,end_pos,timer/5);

    timer+=Time.deltaTime;

  }
How to check if Lerp is Completed in unity
If you want to perform an action after Lerp is completed, you need to determine when Lerp is done. The best part is that you inform Unity when Lerp is complete, not the other way around.
Lerp completes when the third input of Lerp reaches 1. Most of the time, you increment the timer variable using Time.deltaTime. You can use an if statement to check if the timer value equals 1. If it is equal to one, then Lerp is completed.
Here is a code to demonstrate it.
transform.position=Vector3.Lerp(start_pos,end_pos,timer/5);

if(timer<1.01)
{
   timer+=Time.deltaTime;
}
else
{
   Debug.Log("lerp is done");
}
Unity Lerp alternatives
Using a simple Animation
Most of the things done by Unity Lerp can also be replicated using animation. If you don’t like to write code then using animation is a better option. In animation you also get the advantage of visualizing the curve. So, you can smooth out the motion to make it look natural.
Using mathf.SmoothStep
Smoothstep works in the same way as Lerp. The only difference is it smooths out the motion at the end points like a logarithmic graph. This makes the motion look natural compared to Unity Lerp. The syntax of Smoothstep is same as Lerp.
Let’s try the cube movement with smoothstep and new vector. Here is the output.
Here is the code
using UnityEngine;

public class Unity_lerp : MonoBehaviour

{

  Vector3 start_pos;
  Vector3 end_pos;
  Vector3 ofset= new Vector3(5,0,0);
  Vector3 current_pos;
  float timer=0;

  // Start is called before the first frame update

  void Start()
  {

    start_pos=transform.position;

    current_pos= transform.position;

    end_pos=transform.position+ofset;

  }

  // Update is called once per frame

  void Update()
  {

    if(current_pos.x<end_pos.x)
    {

      current_pos.x=Mathf.SmoothStep(start_pos.x,end_pos.x,timer/5);

      transform.position=current_pos;

      timer+=Time.deltaTime;

    }

  }

}
We have tried to cover all aspect of Unity Lerp function. If you need help with anything or have any questions, feel free to leave a comment below.