AI is taking over the world. Not in the way you are imagining. AI can make a lot of process easier using the computational power. The best part is its available for free. In this article, we are going to use Stable Diffusion to create simple game art like concept art, UI icons, pixel art and more.
To use Stable Diffusion for free, you need to install Stable Diffusion on your PC. The minimum system requirement is a Windows 10 PC with at least 4GB of dedicated Nvidia graphic VRAM. If you are using an AMD GPU then ensure you have a model above RX470.

Installing Stable Diffusion
Stable Diffusion requires Python 3.10.6 to run. So, let’s install Python first. Make sure to remove any older version of Python you have installed.
Installing Python
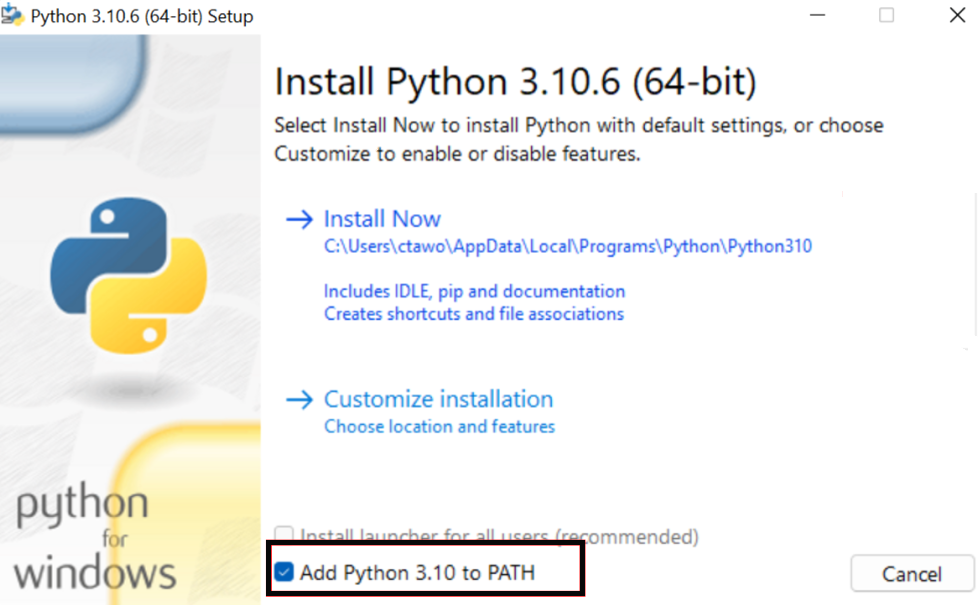
- Download Python 64-bit version.
- Run the installer and make sure you select “Add Python 3.10 to PATH“
- Click install.
Installing Git for Windows
Git is required to clone the AUTOMATIC1111 repository.
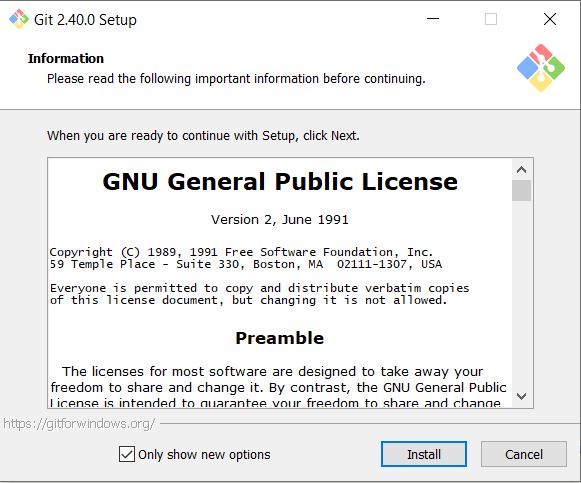
- Download Git for Windows.
- Run the installer.
- Follow instructions to install GIT.
Cloning the Web-UI
Follow through these steps very carefully.
- Open CMD by typing in cmd in windows search bar.
- Make sure you are in the home directory of your user profile. To confirm type in the command below.
cd %userprofile%You should see your prompt shows something like C:\Users\VionixStudio>.
Enter the following command to Clone AUTOMATIC1111 repository
git clone https://github.com/AUTOMATIC1111/stable-diffusion-webui.gitA folder called stable diffusion webui will be created in your home directory.
Download the Model
Navigate to C:\Users\VionixStudio\stable-diffusion-webui\models\Stable-diffusion
Download the Stable Diffusion model v1.5. Version 2 models are still not stable and version 1 models output better images.
Put the file in the above folder. It should look something like this

Run Web-ui
Navigate back to C:\Users\VionixStudio\stable-diffusion-webui folder and run the webui-user.bat file. It will take some time and you should see a message like the one below

If you get an error saying Python not found then most probably you would have forgot to check “Add Python 3.10 to PATH” during Python installation. Reinstall Python with this option checked and run webui-user.bat file.
You should see a web UI like the one in the picture

Generating game Art
Few things to know before you generate your first AI art
- Your prompt needs to give as much detail as possible.
- Stable diffusion generates images at 512×512 and can be scaled later.
- CGF scale defines how strictly Stable Diffusion should follow your prompt. Lesser the value, more creative image.
- Always have batch count more than 2. This will give you multiple images to choose from.
- Add artist or game names if possible.
Now let’s Generate out first art
Here is the prompt
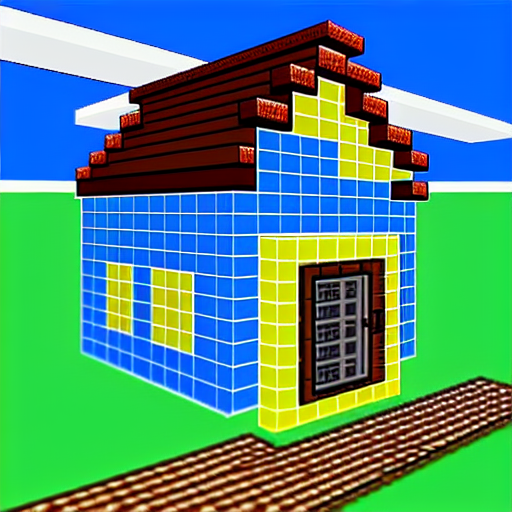
“Create a simple house in pixel art. Wooden, prince 3D, sharp corners.”
I have set the sample method to Euler a and the sampling steps to 50. You can increase the sampling steps to much higher value for quality images if you have a GPU with more than 12GB VRAM.
I have set CGF scale to 21. All the other settings are in default. Now let’s click on Generate.
Here are the results

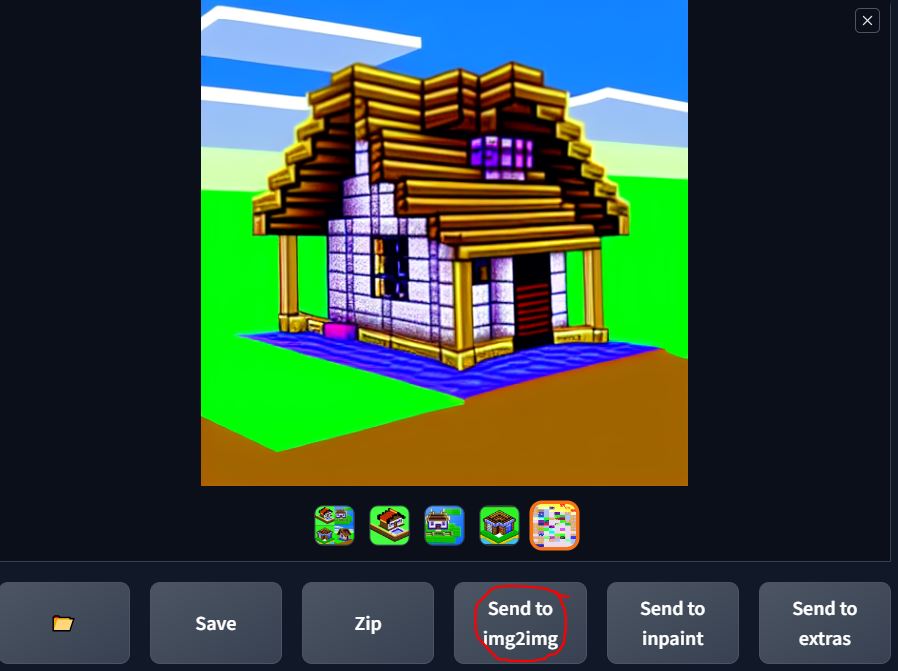
The results are not that good. Here is where we can use the img to img promt of Stable diffusion. Select the image that is close to your requirement and click on Send to img2img.
Play around with CFG scale and denoising strength until you get the image you need. You can also reuse the generated image to create a new image. Denoising strength of less than 0.5 gives the same image with minor variations.
Also try changing your prompt if you are not getting the required result. Clcik on the image that you want and click Save and then download the image.
After a few quick iterations, here is the output we got.