A good skybox can have a positive effect on the aesthetics of your game. But unless you are an artist or you have a stunning photo that you can use as a skybox, you will have to buy skybox textures for your game. All this is changing with generative AI.
Nvidia had launched an AI art app called Nvidia Canvas last year which can be used to draw images by painting colors. Nvidia canvas has updated it with an option for panorama images, which can be used as skyboxes in Unity and other game engines.

In this article, we will learn to use Nvidia Canvas to create a panorama image and use that as a skybox in Unity.
Prerequisite
- A PC with Nvidia RTX GPU with at least 6 GB VRAM.
- Nvidia Canvas App that you can download here.
Creating a Panorama image using Nvidia Canvas
Open up Nvidia Canvas app on your PC and select panorama option. Then click on continue.

Inside the app you will have the following windows
- Draw window(Segmentation Window)
- Preview window (Results Window)
- 3D preview
- Tool bar
- Materials
- Styles
- Layers
You can pick any material from the materials window and start drawing in the draw area. The materials are represented by colors in the draw area. The Canvas app will generate an equal image in the preview based on your drawing. Play around with the canvas until you have a satisfied result. You can also draw in the results window.
Pro Tip: Draw the sky and clouds first to get better results.
Since we are creating a panorama for the skybox, remember that the ends will be stitched. So they must match while stitching.

Importing Panorama to Unity
After you have created a satisfied panorama image, click on the export button on the top. Select dot EXR file from the file type, give it a name and save it.
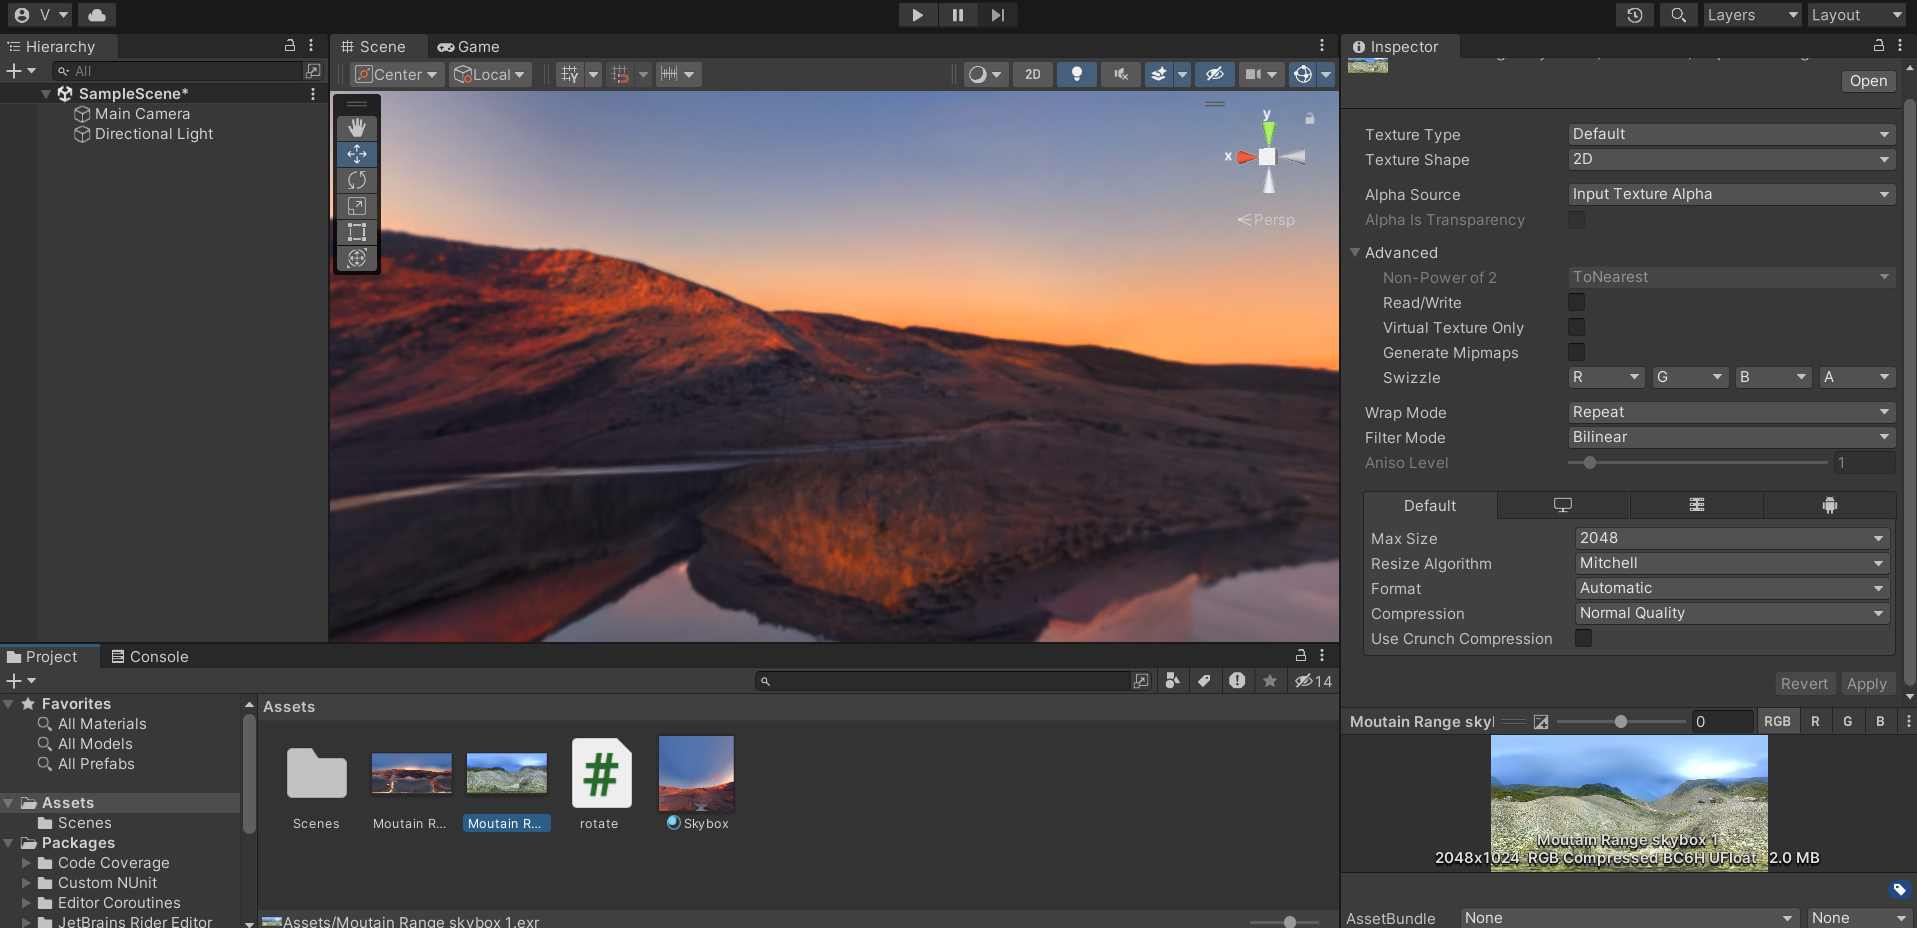
Open your Unity project and drag & drop the panorama file into your Unity project.
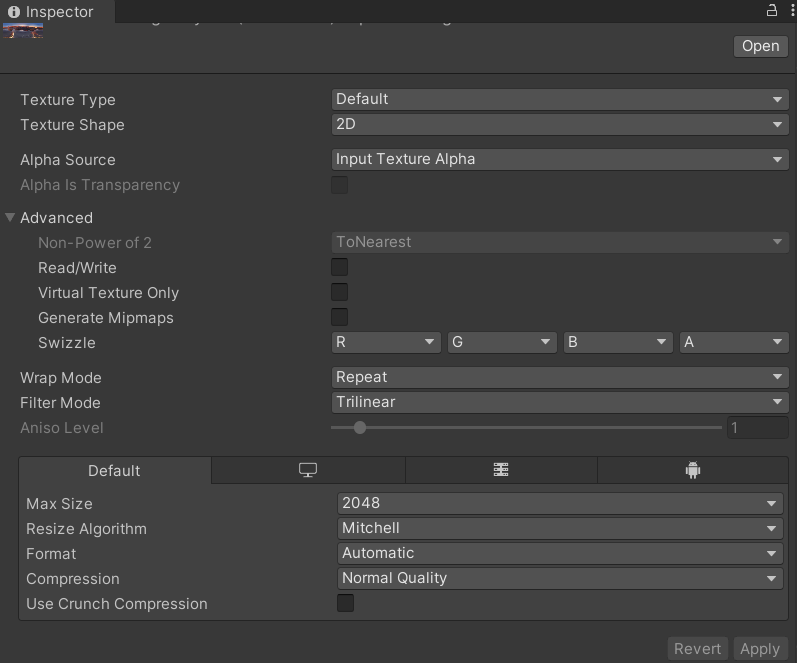
Unity will recognize this file as a texture. Select the texture and make sure the Wrap mode is set to repeat. Uncheck Generate Mipmaps. If Mipmaps are enabled you will see a small line at the place of stitching in the skybox.
Using the Panorama as skybox in Unity
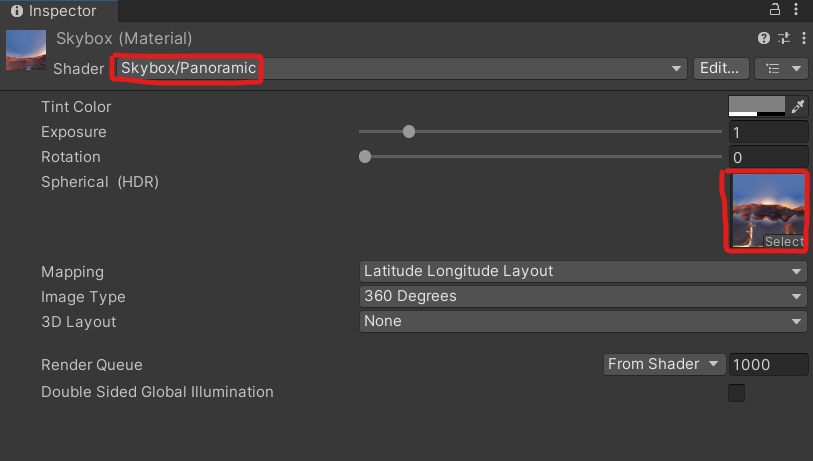
To create a new skybox, we need a new material. Create a new material by right clicking in the project window and navigating to Create>material. Let’s name it Skybox. Now select the material and set the shader to Skybox>Panoramic.
Assign the panorama image that you imported to the skybox.
Now you have the skybox ready. To assign the new skybox to your scene, go to Window>Rendering>Lighting and select the Environment tab. Assign your skybox to the skybox material property.
Now you will be able to see your skybox in the scene view.
You can create multiple variations and try out in your scene. Have fun and let us know if you have any questions in the comment box below.