Cutscenes tell a player what to expect in the next stage of the game or help them understand the story line. Sometimes it is difficult to navigate the scene without a cutscene. It’s better to have a cutscene rather than writing some text on the screen. Cutscenes are cool but creating them was never easy in Unity. After the release of Unity cinemachine, creating cutscene is a piece of cake.
In this tutorial, we will see how to add Unity cinemachine to your project and to use them to create cutscenes.

Is it possible to create a cutscene without Cinemachine?
YES! You can create a cutscene in Unity without cinemachine. You need to add animation to the camera and include a script to switch between the cameras you need. It’s a tedious process especially when you can create it seamlessly with cinemachine.
One thing that you cannot achieve in this method is the smooth transition between cameras. When you switch cameras either using script or timeline, the switch will be abrupt and you need to make multiple corrections to camera angles to make it look good in your cutscene.
Cutscene with Cinemachine and Timeline
I am using Unity 2021.1.13f and the free old seaport asset from Unity Asset store for this tutorial. Create a new scene and import the asset to it.
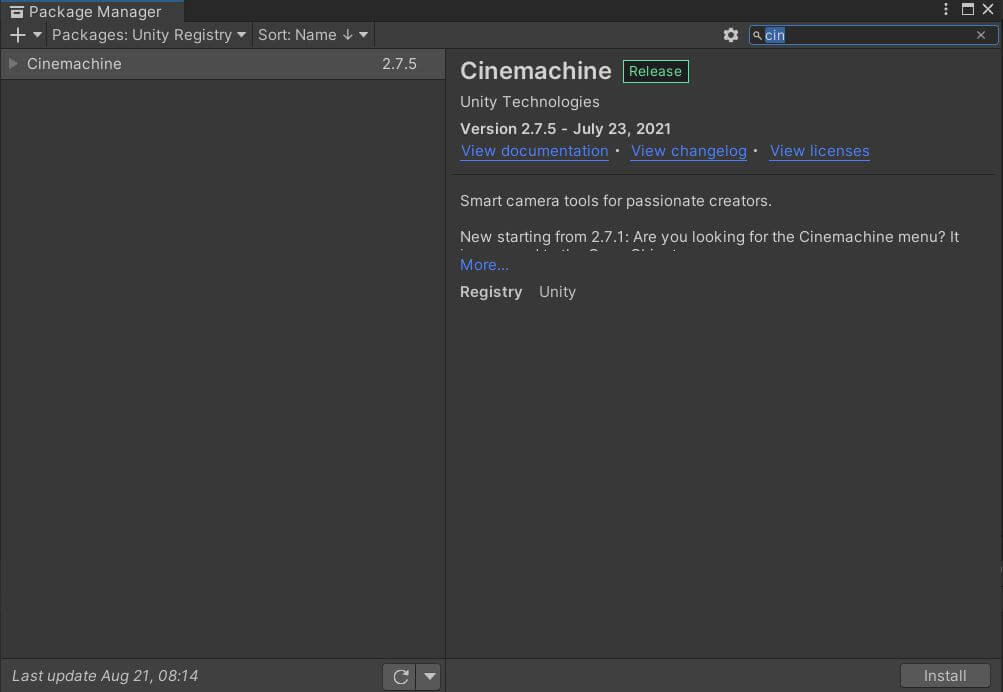
Installing Cinemachine
- Go to Window>Package Manager on the Unity editor.
- Search for Cinemachine.
- Click Install.
Adding Virtual Camera to your scene
- Go to Gameobject>Cinemachine>Virtual Camera
- A virtual camera gets added to your scene and a CineMachineBrain component is added to your main camera.
- Add three virtual cameras to the scene.
- Place them in three different locations and set them in the view you want.
Creating a Timeline
- Click Create an Empty Gameobject.
- Go to Windows>Sequencing> Timeline.
- Select the Gameobject and click create on the Timeline window.
- Save the timeline with any name.
Adding a Cinemachine track
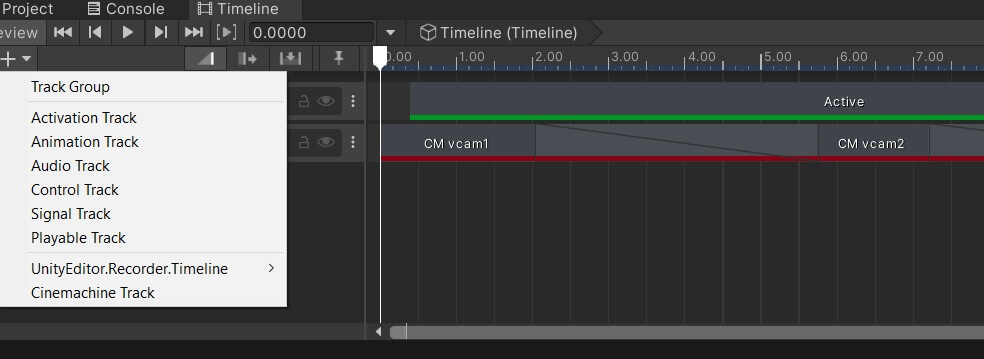
- Click on the + button.
- Select Cinemachine Track.
- Drag and drop the main camera to the Cinemachine Track.
- Drag and drop the virtual cameras to the Timeline.
- You can overlap the virtual cameras to make a smooth transition between them.
- I am adding an Activation track for the fire particles.
- Adjust time and overlap period to get the best effect.
That’s it, play the game and you should see the cutscene. Here is the end product of my tutorial.
Play the cutscene based on a Trigger
The cutscene that we created earlier plays as soon as the game starts. This is not the case in most games. The cutscene needs to play based on a condition.
To do that you need to add a simple script to your main camera and make sure “Play on Awake” is uncheck in the Playable Director component.
Click on add component and add a script called Cutscene_controller.
Copy and paste the below script
using UnityEngine;
using UnityEngine.Playables;

public class Cutscene_controller : MonoBehaviour
{
    PlayableDirector director;

    // Start is called before the first frame update
    void Start()
    {
        director=GetComponent<PlayableDirector>();

    }

    // Update is called once per frame
    void Update()
    {
        if(Input.GetButtonDown("Jump"))
        {
            director.Play();
        }


    }
}
Tutorial in Video format