AI in any context can be fascinating. When it comes to game development AI can be more interesting and challenging. There are many scenarios where you can use AI in game development. Making the enemy follow the player is the most used AI functionality in games. In this tutorial, we will see how to bake a Navmesh and use Unity Navmesh, to make the enemy follow the player.
What is a Navmesh in Unity?
Navmesh is a class in Unity that stores data regarding paths, objects and meshes that are part of navigation in your game. The data available in the Navmesh is used to calculate the path from one position to another while avoiding obstacles.

Navmesh Agent
Navmesh agent is the game object, that you want to move using AI pathfinding. In this case, the Navmesh agent is the enemy game object. To set an object as Navmesh agent, select the game object and click add component on the inspector window. Select Navmesh agent from the list.
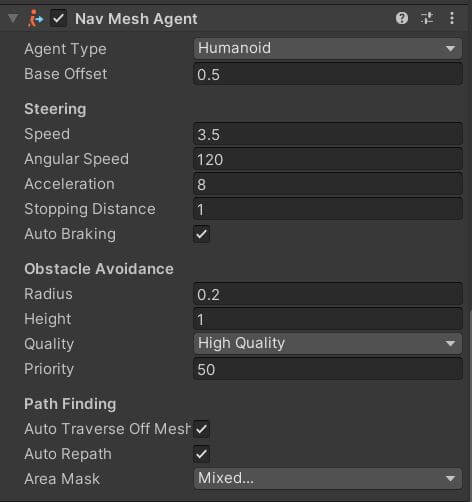
Set the speed and acceleration depending on how fast you want the enemy to move. The stopping distance parameter needs to be set to a value greater than the sum of the radius of both player and enemy. If this is not set properly, the enemy AI will try to move even after colliding the player.
You will need to optimize these settings based on your game.
Navmesh Obstacles
The objects that will remain static, and will act as an obstacle need to be marked as Navmesh obstacle. You can mark a non-static object as an obstacle too. But a non-static obstacle will affect the performance of your game.
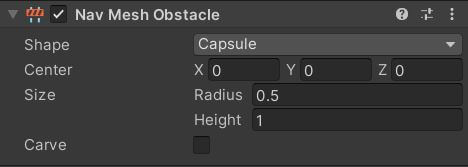
The Carve option is to embed the obstacle data into the Navmesh. When carve is not enabled, the agent tries to avoid the obstacle but may collide with it when it’s nearby.
It works similar to a collider in Unity. In case Carve is checked, the Navmesh data itself is altered and the agent plots a new path to avoid obstacles all together.
Baking a Navmesh
Once you have assigned the Navmesh agent and the obstacles, the next step is to bake the Navmesh.
- Go to Windows>AI> Navigation on the Unity editor.
- Select the plane and set it as navigation static.
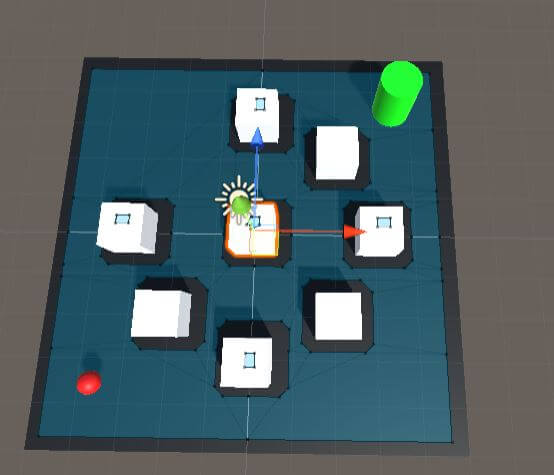
- Select all the Navmesh obstacles and the plane in which you are going to move the enemy AI.
- Do not select the Enemy Navmesh agent.
- Select the Bake tab on the navigation window.
- Click bake. You should see the Navmesh marked in blue on your scene.
Move the enemy AI
To make the enemy go to the player position you need to set the player transform as the Navmesh agent destination.
We will get the player position and the Navmesh agent. Then we will use NavMeshAgent.destination to set the enemy agent destination. You need the namespace UnityEngine.AI. Here is how to use the code
- Attach a script called Playerfollow to the enemy.
- Copy and paste the code below to the script.
- In the inspector window, assign the player game object to the Playerfollow script.
- Press play. The enemy will go to the player’s location. If the player moves, the enemy will automatically reroute and follow the player.
using UnityEngine;

public class Playerfollow : MonoBehaviour
{
    public Transform Playerpos;
    UnityEngine.AI.NavMeshAgent agent;
    // Start is called before the first frame update
    void Start()
    {
       agent = GetComponent<UnityEngine.AI.NavMeshAgent>();
    }
    void Update()
    {

          agent.destination = Playerpos.position;

    }
}
You have successfully created an Enemy AI using Unity Navmesh. If there is break in the platform, the player can jump over it. In order to make the AI jump the break, you need something called as “off mesh links”. We have created a separate tutorial of Off mesh link, do check it out.
For our next tutorial in the learn Unity series, we will learn how to save data using PlayerPrefs.