Unity is a very powerful Game development tool and in recent years Unity has put some efforts to help developers animate and model their game assets inside Unity. Unity 2D animation has grown a lot, now you can animate a 2D sprite using skeletal animation in Unity. Our next task for learning Unity is 2D animation.
In this tutorial, we will see how to create a simple 2D animation, how to create animation with sprite sheet and how to use the 2D skeletal animation tool.

I assume you know how to start a new project in Unity. For the purpose of this tutorial Lets create a new 2D project. If you are completely new to animation in Unity, I suggest you read our Unity Animation and Animator guide before proceeding further.
Creating a Simple 2D Animation
Adding Sprites to the scene
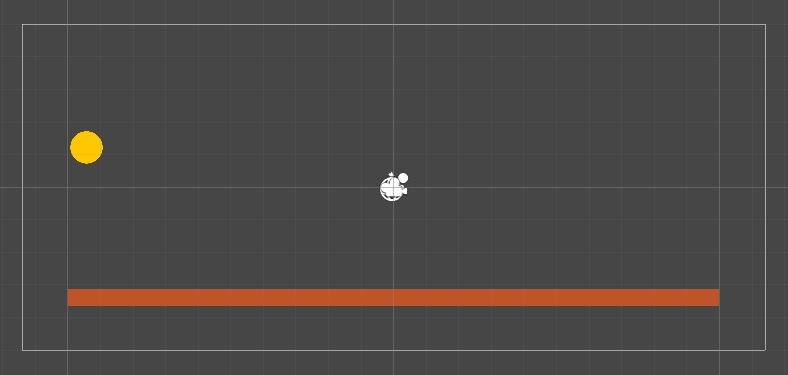
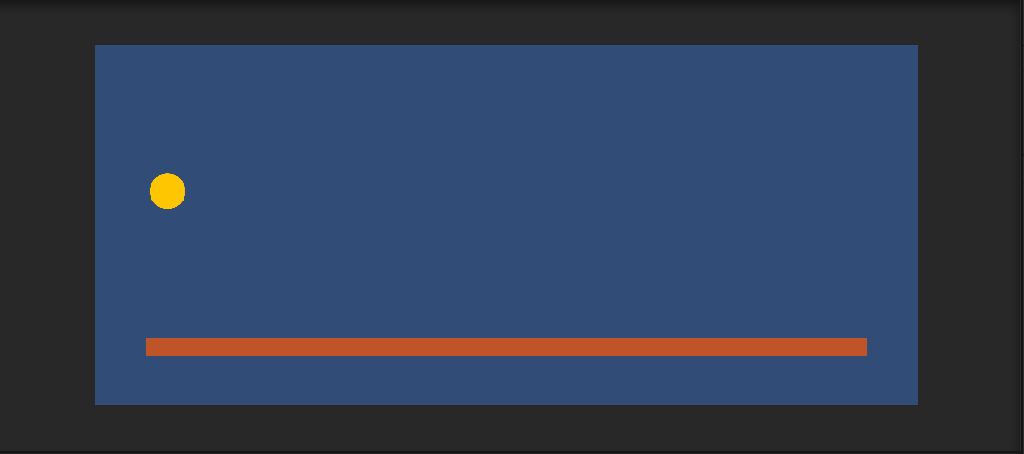
Let’s add a 2D square to the scene. Click on + sign in the hierarchy window >2D Objects>Sprites>Square.
Adjust the X and Y scale to 20 and 0.5 respectively so that it looks like a platform. Also set the color to brown.
Add a circle in a similar way and set the color to Yellow.
You don’t have to worry about the circle’s Transform as of now.
Your scene should look something like the image below.
Animating the ball
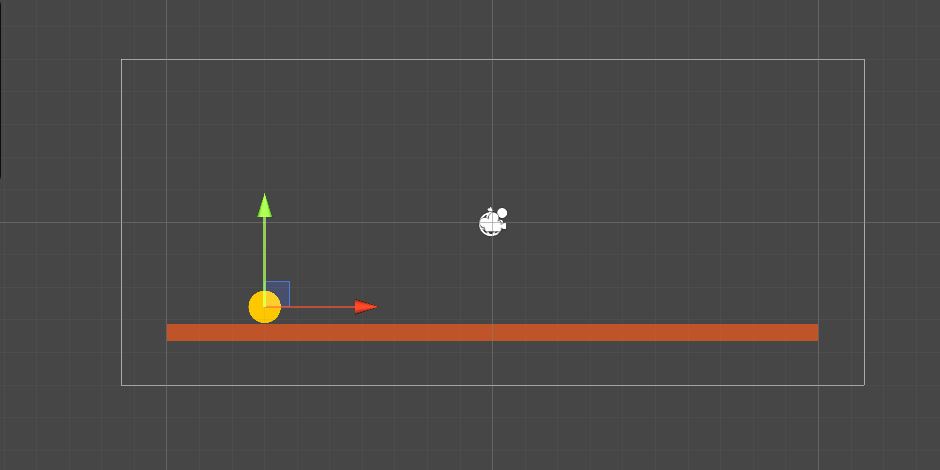
Move the Ball to the starting position.
Go to Window>Animation>Animation or Press Ctrl+6 to open the animation Window.
Select the ball in the Hierarchy window and click on the create button on the Animation window.
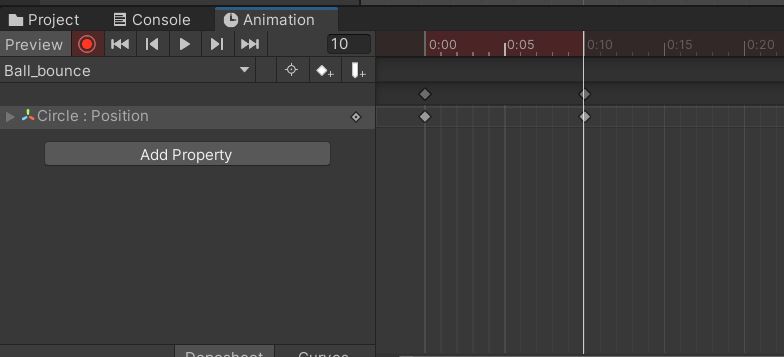
Give a name to the Animation clip and click save. Let’s name it Ball_bounce.
Now you should see an Animator component added to your ball game object.
Click on the round red button on the left top of the Animation window to record an Animation.
After you click record, select the time on the timeline and move your ball to the new position.
Say you want the ball to hit the ground at 0.10 seconds then click on 0.10 and move the ball position to near the ground.
Create a similar timeline event for other bounces.
Here are the settings I have used
| Timeline | Ball position |
|---|---|
| 0:00 | (-9.5,1.2) |
| 0:10 | (-8,-2.7) |
| 0:20 | (-5,-1.1) |
| 0:30 | (-2,-2.68) |
| 0:40 | (0.5,0.5) |
| 0:50 | (3,-2.75) |
| 1:00 | (5,-2.75) |
Here is the final animation
You can add more Timeline points to make the animation smooth. You can also play around the ball’s scale value to make it look compresses when it hits the ground and elongated when on the top.
How to animate a 2D Sprite Sheet in Unity
Sprite sheet animation is very simple. Unity automatically slices the sprite sheet to create individual sprites. If the sprite sheet is not packed correctly then you may have to use the sprite editor to slice the sprites.
Before we start, your sprite sheet must have a transparent background. If not, you can make it transparent following our tutorial on making the background transparent in Gimp.
Importing the sprite sheet to Unity
- Import your sprite sheet on to Unity editor.
- Select the sprite sheet and go to the inspector.
- Set the texture type of Sprite (2D and UI).
- Set the Sprite mode to multiple.
- Now click apply.
Your sprite sheet should be sliced now and all the sprites will be available as children of the sprite sheet. If the automatic slicing is not proper then use the sprite editor as shown below.
Using the Sprite Editor
If you did not use the 2D project template which starting a new project, then you need to import the 2D sprite package from Unity package manager to use Sprite Editor.
- Select the sprite sheet in the project window.
- Then click on sprite editor option in the inspector.
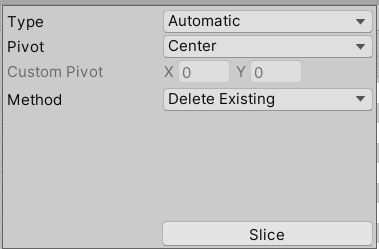
- Click the arrow near Slice.
- Let the settings be in automatic.
- Click on the slice button.
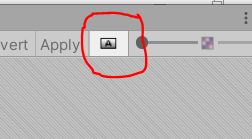
Now use the toggle button on the right top to switch the view to black and white. This will give you a better view of how the sheet has been sliced.
Now click on each sprite and adjust the border as required. Most of the time automatic slice does a good job.
If your sprite sheet is evenly made then you can also use the cell count setting to slice the sprite sheet.
You can also adjust the pivot point of individual sprite by moving the center point.
Close the window and click save. Now you should be able to see the sliced sprites in the project window.

Creating Animation using the sprites
- Drag and drop the first sprite to the Hierarchy window to create a game object for the sprite.
- Open the Animation window by going to Window>Animation>Animation
- Select all the sliced sprites inside the sprite sheet. Do not select the sprite sheet.
- Drag and drop them to the Animation window and adjust the timeline.
- Click on Play on the Animation window, to see how the animation looks.

Unity 2D Skeletal Animation
Getting your Image Ready
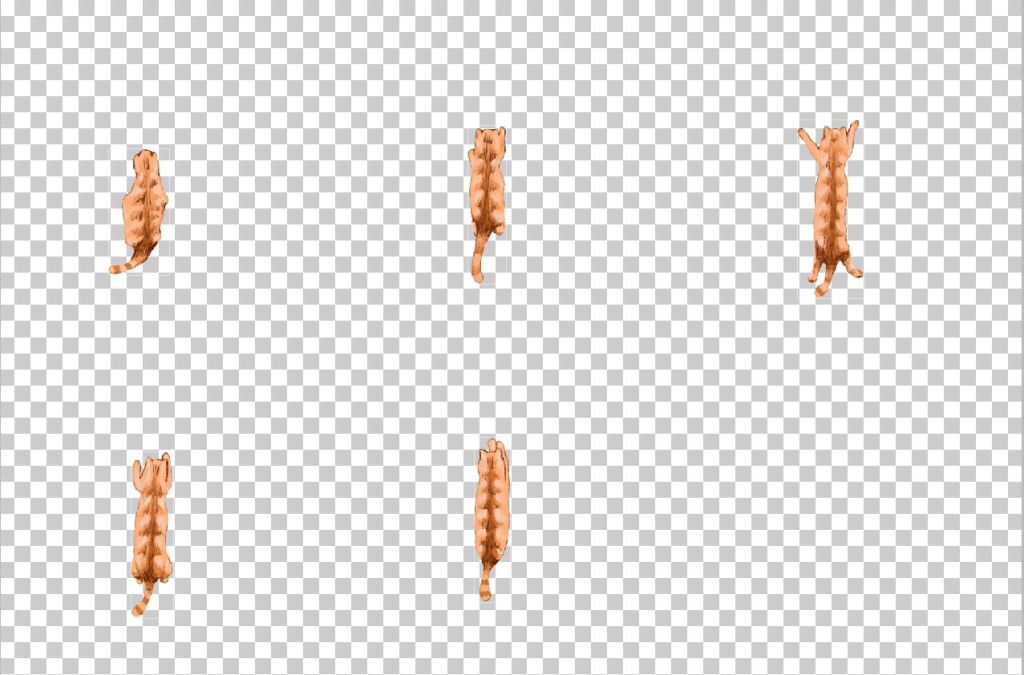
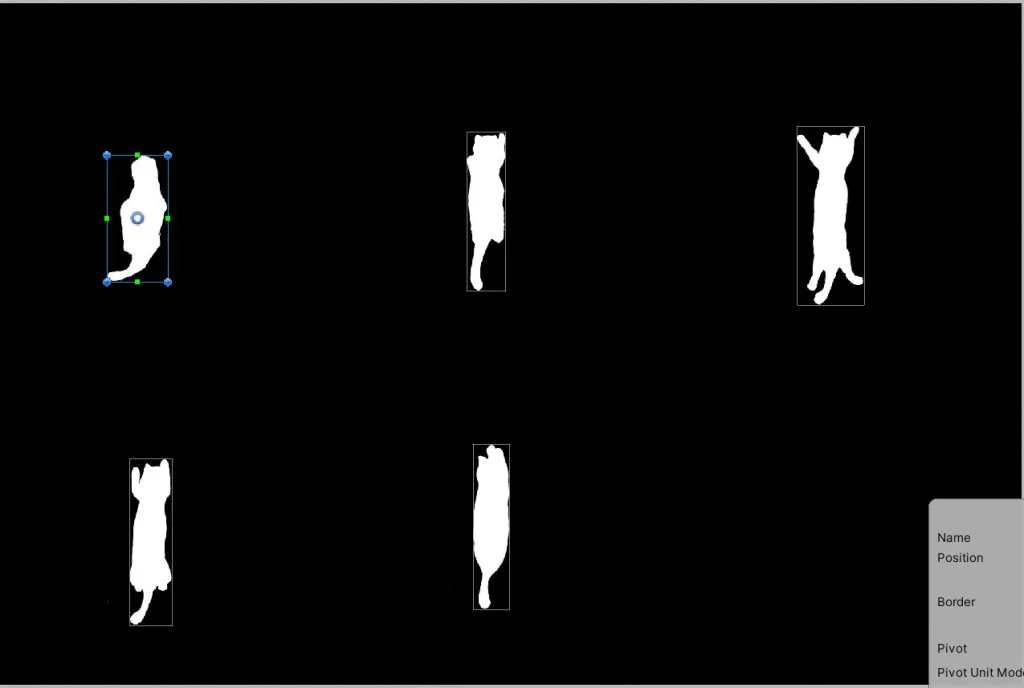
If you are using a PNG file then you need to make sure that the sprite’s body parts are separated and not clipping on to each other. If not, the animation will not turn up Good. Here is the example sprite that you can download from opengameart
The background of your PNG image should be transparent. If you do not know how to do it, check out our tutorial on how to make your sprite background transparent.
Importing Image into Unity
Drag and drop your image on to Unity’s project window.
Select your sprite and make sure the Texture type is set to 2D and UI, sprite mode is set to Single. In the case of a PSB file this setting needs to be set to multiple.
Drag and drop your sprite on to the scene and if you find the sprite is too big then select the image in the project window and increase the pixel per unit and hit apply.
Your Image is Ready for Animation.
Required Unity packages for 2D skeletal Animation
If you have used a 2D template to start your game these packages will already be installed. If not, you need to install the following packages.
Go to Windows>Package Manager
Select Unity Registry and search for 2D Animation and 2D Sprite. Install both the packages.
If you are using a PSB file then add PSD importer too.
Adding Bones to your sprite
Select your Image file in the project window and click on Sprite Editor.
On the top left of the Sprite Editor select Skinning Editor

Your Skinning editor window will open. Double click on your sprite to select it. This step is very important or you will not be able to add bones to your sprite.

Things to remember
- Left click to create a new Bone.
- Right click or press ESC to end bone.
- Select the bone with left click and click inside the next body part to create a connected bone.
For example, the leg is connected to the lower body bone. So first click inside the lower body bone and then click inside the leg sprite to create a leg bone.
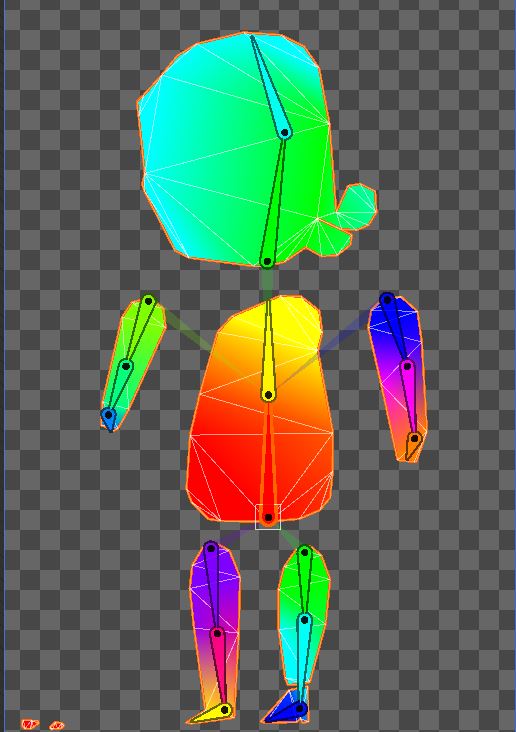
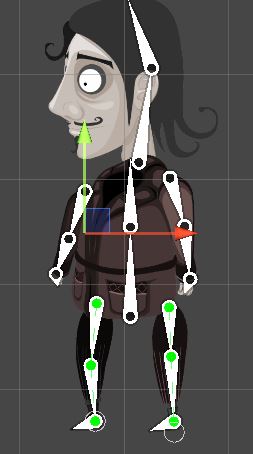
Create bones for the whole body as shown below
Adding Geometry, Weights and Visibility to the bones
Click on Auto Geometry and Check the Weights check box on the popup in the right bottom.

Click on generate for Selected.
Your sprite should be filled with colors. You can move around one bone to see how it affects the other bones.
If you want to bring the bones to initial position after testing then click on restore pose.
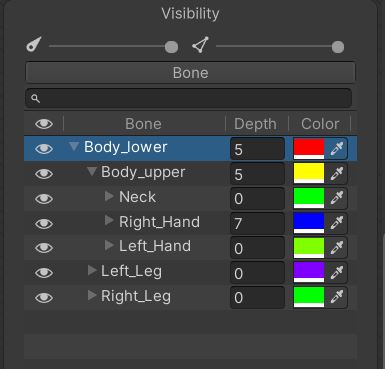
Click on the Visibility Button on the Right top corner.
You will see all the bones attached to your Character. You can double click on it to change the name. (Sometimes more clicks are required).
You should also see a depth option. This value is very important.
Your Character’s hand on the right will be above the body when it moves and the hand on the left will be behind the body. The bone which should be on the top should have a greater number. You need to add the depth values for the child bones too.
Adding in the depth values for all bones. You can leave out the bones that you think will never be covered by another bone.
Getting Your Gameobject ready for Animation
Select your character in the Hierarchy window and add a Sprite Skin component. This is not required if you are using a PSB image.
Click on create Bone and all the bones you created will get populated on your character. Now your character should look like this.
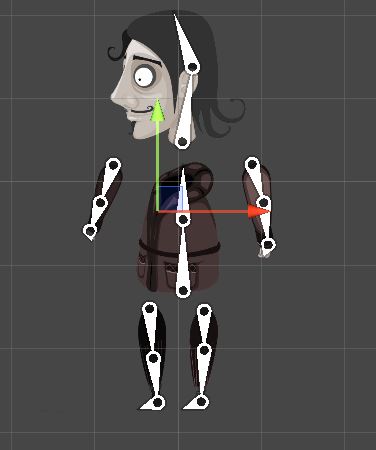
Put the body parts together so that it looks like the character you want.
The next component required is IKManager2D.
This is required to move all the bones in the limbs together. You should add this to the lowest bone i.e. the feet of the leg. It affects till the 3rd bone. So, you need to have at least three bones in a limb.
Click on the +sign in the IKManager2D and select Limb. This adds a new component to your Hierarchy called new_2DLimbSolver2D. Select this object and rename it as Left_L_2DLimbSolver2D.
Drag and drop your foot bone to the effector Variable in the Limb Solver. Move the Limb Solver transform to somewhere near your feet.
Click on Create Target. Then move your limb solver to see if your leg bends in the right direction. If not check the Flip option.


Do this for your both legs and Hands.
Creating a Jump Animation
For this tutorial, let’s create a jump animation for the character.
Select the character in the hierarchy window. Go to Window>Animation>Animation.
In the Animation window click on the create button
Let’s name the Animation Jump and save it.
Click on the record button
Create new frames for every pose in Jump Animation. Move the legs and hands using the Limb Solver.
After creating your keyframes click on the record button again.
You have created your first skeletal animation in Unity and I hope yours is better than mine. You can create more animations and set up a state machine using Unity Animator.

This covers all the basics required to create a 2D animation. Next, we will learn, how to play an audio clip in Unity.