While searching for assets for 2D games we end up finding 3D models similar to what we are looking for. What if we can convert those 3D models into sprites along with the animations?
If you are looking for a free way to do it then you need to take screenshot of at least 5 frames for each animation and then open the screenshots in an image editor to remove the solid background.

The asset used in this tutorial can do all this inside Unity and give you PNG images with transparent background ready to be used for a 2D game.
In this tutorial, we will see how to do that in Unity using a simple asset from the Unity asset store.
Tools Needed
- Unity version 2021.1.13 or above.
- 3D model to 2D sprite converter.
Importing the asset
- Purchase the asset and add the asset to the My Assets list.
- Go to Unity editor and open Package Manager.
- Find 3D model to 2D sprite converter.
- Download and import.
- Only the prefab and scripts folder are mandatory. You can import the complete package if you need an example scene and guide.
Let’s start converting
- Create a new scene.
- Add the Png_capture prefab to the scene.
- Add your 3D model that you need to convert to 2D PNG image.
- Set your Camera Projection to orthographic.
- Set the camera background to some solid color.

- Make sure the character is visible in the game view as in the image below. Your game view will be your final PNG image. So, set the view as you need.

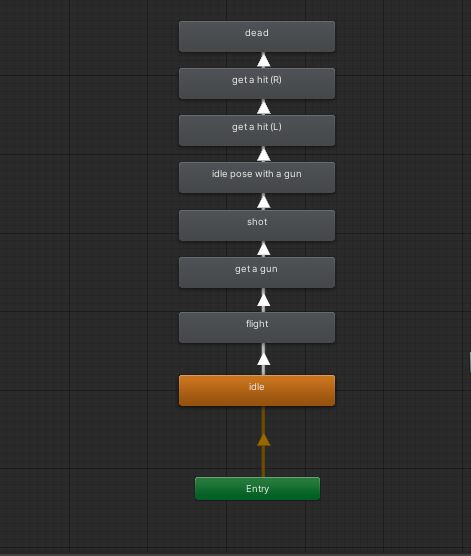
- Create a new Animator for your 3D object and add all your animation state to it.
- Create a new Boolean called “Next_state” and add it as the transition condition
- Add your 3D object to the player variable of Png_capture.
- Set the number of frames to capture per animation state.
- Set the number of frames to skip before taking a screenshot.
- For example, if you set the frames to capture as 50 and the number of frames to skip as 5 then it will make one PNG for every 5th frame. So, the total number of Images captured will be 10.
- In version 1.1 you will have a Prompt variable. You need to add a text Gameobject to it and set the text as inactive in the Hierarchy.

- Play the game and press the enter key after the prompt text is displayed. Animation state gets changed when you press the enter key.
- Once all the animation states are played, Stop the game and refresh the project window.
- A new folder for every animation state with the respective PNGs with transparent background should appear in the project window.
- Set the texture type of all the images to 2D and UI.
“How to convert to 2D sprite: buy our plugin”
That’s super helpful, thanks a lot.
Hi,
If you are looking to do it yourself without a plugin then take a look at ScreenCapture.CaptureScreenshot in Unity.