When it comes to game development, lighting is a crucial aspect that can make or break the overall visual appeal. Unity, one of the most popular game engines out there, offers a robust lighting system that can help you create immersive and realistic game worlds. In this article, we’ll cover the basics that you should know about Unity light.
Understanding Unity Light
Unity Light is a component that lets you add lighting to your game objects. It’s responsible for illuminating the scene and creating shadows, reflections, and other visual effects. In Unity, you can use different types of lights, each with its own set of properties and characteristics:

- Directional light: simulates the sun or a distant light source that illuminates the entire scene uniformly.
- Point light: emits light in all directions from a single point, useful for creating light sources such as lamps or torches.
- Spot light: emits a cone-shaped beam of light in a specific direction, useful for creating spotlights or flashlights.
- Area light: emits light from a rectangular shape, useful for creating soft and diffuse lighting.
Each type of light can be further customized with various properties such as intensity, color, range, and angle. The types of lights may defer if you are using URP for a 2D game. Unity has a bunch of options for 2D lights. You can know more about them in our Unity 2D lights tutorial.
Direct and Indirect Lighting
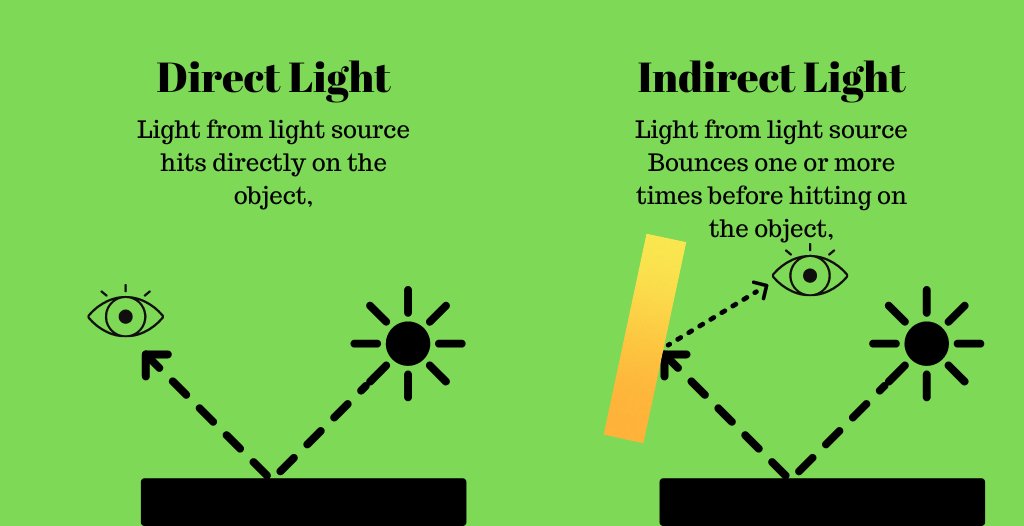
Direct lighting refers to light that comes directly from a light source, such as the sun or a lamp. This type of lighting is easy to understand and implement, as it involves placing light sources in the scene and adjusting their intensity and direction to achieve the desired effect. Direct lighting is great for creating shadows and emphasizing the shape and form of objects in a scene. It can be used to create dramatic effects, such as highlighting a character’s face or creating a sense of depth and perspective.
Indirect lighting, on the other hand, refers to light that is bounced off of surfaces in the scene. This type of lighting is more complex to implement, as it involves calculating how light bounces around the environment and interacts with objects. Indirect lighting is important for creating more realistic and natural-looking scenes, as it takes into account how light behaves in the real world. It can be used to create soft and subtle lighting effects, such as the way light filters through a window or the way light reflects off of a shiny surface.
You can read more on Direct and indirect lighting on NVidia’s blog.
Setting up Unity Light
To add lighting to your Unity project, involves adding one or more light sources to your scene, configuring their properties, and baking the lighting data into the scene.
The default Unity scene comes with a directional light. You can adjust the properties by selecting the light in your hierarchy window. But if you want to add different lights to your scene then follow the steps below.
Here are the steps to set up Unity Light:
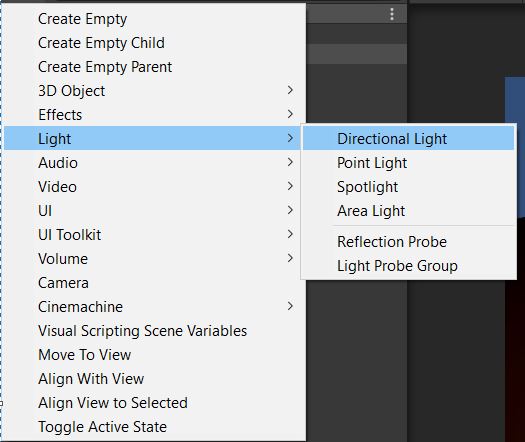
- Add a light source to your scene: To add a light source, go to GameObject > Light, and choose the type of light you want to add.
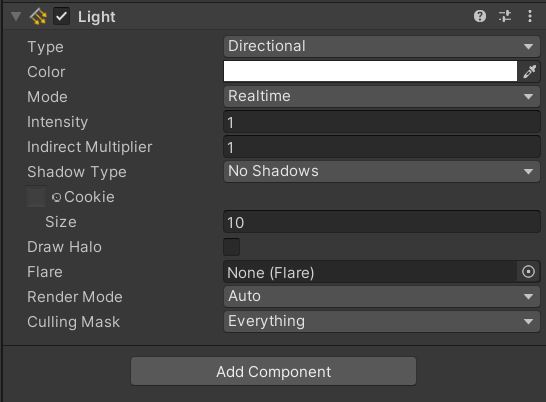
- Configure the light properties: Once you’ve added a light source, you can configure its properties in the Inspector window. This includes setting its color, intensity, range, and other properties.
- Bake the lighting data: After you’ve set up your light sources, you need to bake the lighting data into the scene. This involves calculating how the light interacts with the scene’s geometry and materials and saving that data into lightmaps or light probes. To do this, go to Window > Rendering > Lighting, and click on the Generate Lighting button. This step is only required if you have set the light mode to baked.
Adding custom Light using Emissive material
Unity’s default light types are great. But sometimes game developers do require glowing surfaces that can act as a light source. You need to bake the lighting to use Emissive material and use Light Probes to effect dynamic objects. Here is how you can convert any object into a light source.
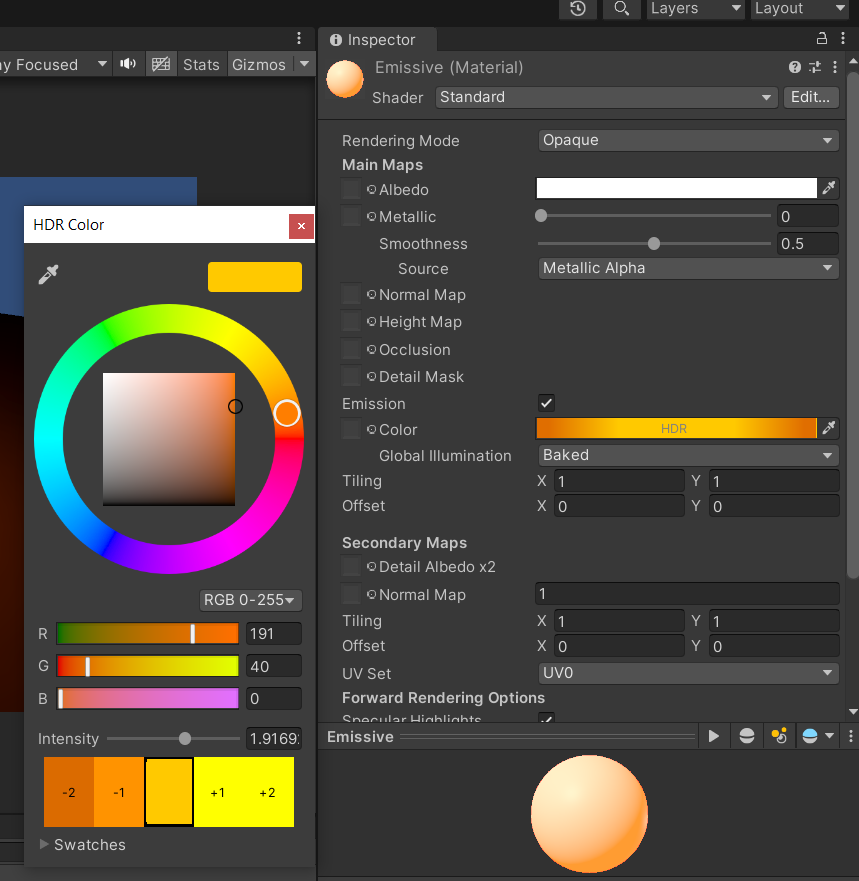
Create an Emissive Material
- Right click on the project window>Create>material.
- Set the Emission property to true.
- Set the Emission color and strength (found inside the color property).
Add the material to your object
- Let’s add a default sphere to our Unity scene.
- Drag and drop the material on to the sphere in the hierarchy window.
- Select the sphere and go to the Inspector window and find the lighting option under Mesh renderer.
- Check the Contribute to Global Illumination check box.
Bake the light
The final step is to bake the light.
- Select all the objects that need to be affected by the light and set them as static. If you have moving objects then use light probes.
- Go to Window>Rendering>Lighting.
- Click on Generate lighting button on the bottom right.
If you want the custom light to be the only light in the scene, then you can disable ambient lighting.
Advanced Unity Light Techniques
While Unity Light is easy to use, there are several advanced techniques you can use to take your lighting to the next level. Here are some of them:
- Real-time global illumination: Unity’s real-time global illumination (GI) system lets you create dynamic, indirect lighting that reacts to changes in the scene. This can make your game world look more realistic and immersive.
- Light probes: Light probes are a type of object that you can use to sample the lighting information in your scene. By placing light probes in your scene, you can ensure that objects in your game world are lit correctly, even if they’re not directly under a light source.
- Lightmap baking: Lightmap baking is the process of precomputing the lighting information in your scene and storing it in textures called lightmaps. This can improve performance and reduce the processing power needed to render lighting in your game.
- Post-processing effects: Unity’s post-processing stack lets you add various effects to your game’s visuals, including bloom, depth of field, and color grading. These effects can enhance the mood and atmosphere of your game.
Conclusion
Unity Light is a powerful tool that can help you create immersive and visually stunning game worlds. By understanding its basics and mastering its advanced techniques, you can take your game’s lighting to the next level. We hope this article has given you a good understanding of Unity Light and its capabilities. Happy game development!