
When it comes to game development, creating a compelling and immersive experience for players is paramount. One of the critical components for achieving this is, Unity Cameras. The Unity camera plays a vital role in rendering the game scene, creating a view of the game world that players can interact with in real-time. Also, it’s one of the major components to master while learning Unity.
In this article, we will take an in-depth look at Unity Camera component and explore its different capabilities.

What is a Camera in Unity
Unity Camera component is a fundamental element in game development that provides a view of the game world to the player. The camera component is responsible for rendering the game scene, including objects, characters, and environments, and presenting it to the player in real-time.
With Unity’s Camera component, developers can easily create a range of camera effects, such as depth of field, motion blur, and color grading, to enhance the visual quality of their game. Additionally, the camera component also plays a critical role in game design, as it can be used to create different gameplay mechanics, such as perspective puzzles, stealth games, and first-person shooters.
Unity Camera properties
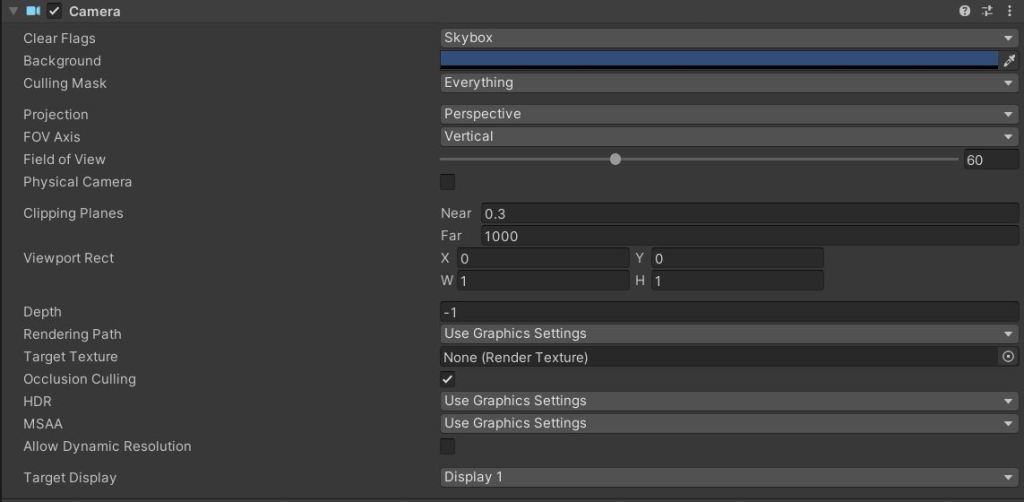
Clear Flags
Clear Flags determine what to draw in the empty area of the scene. You can select one from the 4 options of Skybox, Solid Color, Depth or Don’t clear.
- Skybox renders a sky like background.
- Solid Color displays the selected color in the background.
- Depth displays a black color in the background.
- Don’t clear renders the previously rendered image.
Background
The Camera will render the background color when there is no object to render. You should be able to see this color before the camera starts rendering. This setting will only be available, if you have selected Skybox or Solid Color option in Clear Flags setting.
If you want to add a custom background image, then check out our tutorial on creating custom camera background in Unity.
Culling Mask
Culling Mask allows the camera to render or ignore game objects on particular layers. If you want the camera to ignore all game objects on the UI layer, then you can uncheck the UI layer from the drop down.
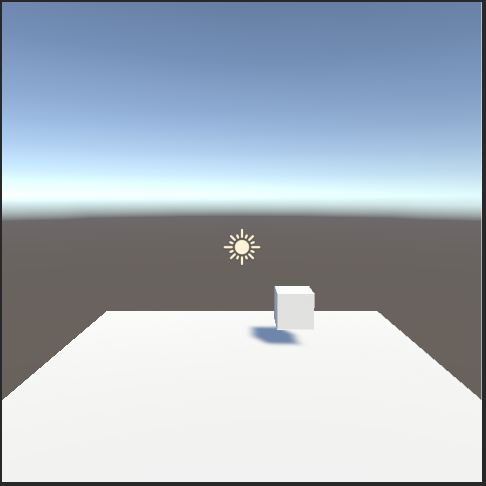
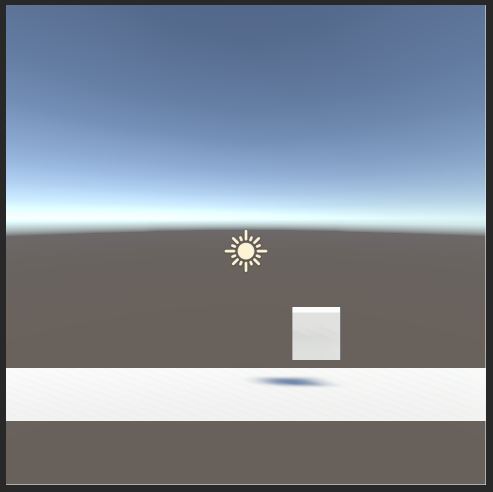
Projection
Projection is best understood as an image. Check out the images below
Field of View
Field of View or FOV is something similar to zoom in the real-world camera. You can adjust the FOV using the slider provided. Unity also gives you a FOV axis option. You can set it to either vertical or horizontal.
The FOV option is replaced by size in case of an Orthographic Camera.
Clipping plane
A Clipping plane in Unity Camera is a boundary that determines which objects are visible within the camera’s view frustum (frustrum is a pyramid with the top cut off) and which ones are not.
Unity allows you to set the near plane and far plane options for the Camera frustum.
Depth
The depth parameter determines the order in which multiple cameras render the game scene. When there are multiple cameras in a scene, the depth parameter allows developers to specify which camera should be rendered first.
Viewport Rect
Viewport rect property is used to set the size of the camera view in your scene. The X and Y property can be used to set this. (0,0) represents the bottom left corner of the scene and (1,1) represents the top right corner of the scene.

All the other options in the camera component are very case specific and we will discuss them in the required tutorials.
Creating a First person camera view in Unity
You can position the Unity camera in different ways to get different view. To use the Camera as a first-person camera, follow the steps below
Set the Camera as the child of your player

Set the position of the camera to where the head of your player will be
As the camera is a child of the player, it will move and turn along with the player. Your FPS controller should be enough to move the camera and the player.
Third person camera view
As in case of the first-person Camera, you can make the camera a child of the player and set the view so that the player in visible on the camera view. This is the easiest way to make a third person camera. But there is one drawback with this. If you want to see the player jump or rotate then you will have to use a camera follow script and move the camera only in case of horizontal movement.
Camera Follow Player with Script
Set your camera as required by adjusting the transform in the editor. This will be your initial camera position. We will calculate the offset based on this in the script.
- Create a new script by name Camera_Follow in the project window using create>new C# script.
- Copy and paste the code below in the script.
- Add the script to camera using add component button in the inspector window or drag and drop the script to the camera.
- Drag and drop the player game object to the Camera_Follow script.
- Run the game and the camera will follow the player.
using UnityEngine;
using System.Collections;

public class Camera_Follow : MonoBehaviour
{
public GameObject player;
private Vector3 offset;
private Vector3 newtrans;

void Start ()
{
    offset.x = transform.position.x - player.transform.position.x;
    offset.z = transform.position.z - player.transform.position.z;
    newtrans=transform.position;
//not taking y as we won't update y position.

}
void LateUpdate ()
{
newtrans.x= player.transform.position.x + offset.x;
newtrans.z= player.transform.position.z + offset.z;
transform. Position = newtrans;
}

}
In the Start function, we take the initial distance between camera and the player as the offset. In the LateUpdate function, we add the player current position with offset and set it to the camera. We use LateUpdate because the camera position must be updated after the player. Otherwise, there might be some jittery movement.
Using Cinemachine to create first person and third person Camera
With the release of Unity Cinemachine a lot of camera features have been inbuilt in the virtual camera. Let’s see how to make the camera follow the player using virtual Vcam in Cinemachine.
Step1: Install Unity Cinemachine
- Go to Windows>Package Manager.
- If you are using Unity 2021 then select Packages: Unity Registry. You can skip this step for older versions.
- Search Cinemachine and Install it.

Step2: Add a virtual cam
- In older versions of Unity, you will see a Cinemachine option on the main menu. From Unity 2021 and above, this option is moved inside Gameobject menu.
- Adjust your scene view to the place where you want to add the camera.
- Go to Cinemachine>Virtual camera.
- This will add a Vcam to the scene and a Cinemachine brain to the main camera.
- We need only one Vcam for this purpose.
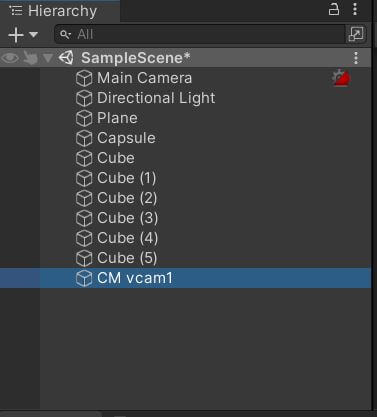
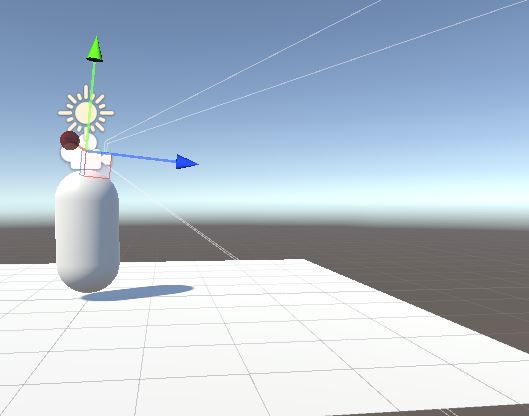
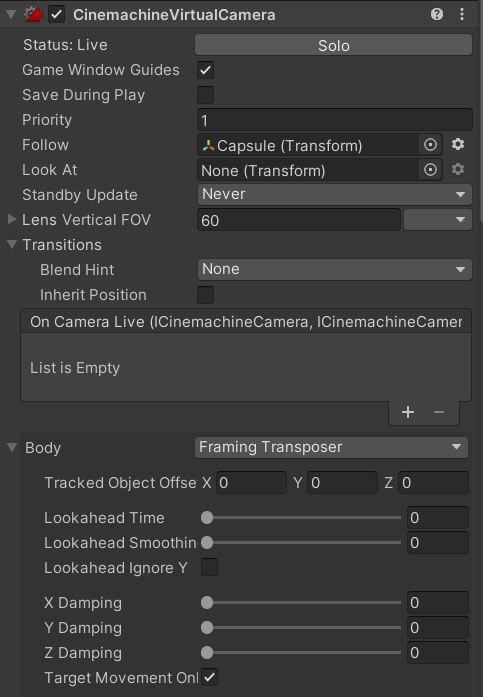
Step3: Assign the player to the Virtual Cam
- Select the Virtual camera in the Hierarchy window.
- Go to the inspector window and find the CinemachineVirtualCamera component.
- Drag and drop your player to the follow option in the CinemachineVirtualCamera component.
- In the body component select framing transposer.
- Reduce x, y, z damping in the body component to reduce the delay in follow.
Play the game and the camera will follow the player.
This method cannot be used if you have multiple virtual cams for making cutscenes.
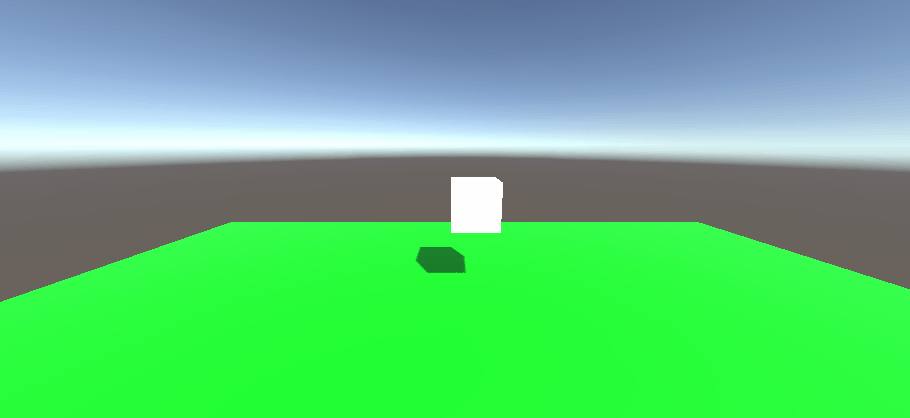
Using multiple cameras in One scene
You can have multiple cameras in your scene and render them together to present a combined view to the player. The most common example, is providing a simple overview on the top of the screen. Let’s see how to do it.
- Add a new Camera to the scene.
- Set the Camera view to orthographic.
- Set the position of the camera on top of the player and rotate the camera to look down on the player.
- Create a new layer called player and set the player to the player layer.
- Set the camera’s culling mask to render only player.
- Set the Viewport Rect value to X-0.75 and Y-0.75. This will set the camera to the top of the screen.
Here is how the output will look like

Hope this article game you a clear picture of Unity camera component. If you have any questions, feel free to leave them in the comment box below. For our next tutorial, we will create a timer in Unity.