
From a camera’s point of view, all the game object are at the same depth. Depending on the input from the renderer, it decides which object to draw first and which object to draw the last. In case of a 3D game, the depth of each object varies based on the 3D position. But in a 2D game, most sprites are added at the same distance from camera.
So how does Unity know which game object will be Infront and which will be in the back? The answer is by adding a sorting layer or using the order in layer parameter.

You can also, just set different z values for different sprites but it becomes very difficult to manage with a greater number of sprites.
What are sorting layers?
In Unity, sorting layers define the relative order of objects in the scene. They determine which objects appear in front and which in the back.
By default, Unity renders objects based on their position in the scene. However, when you have multiple objects overlapping or intersecting, you may want to control which object appears on top. This is where sorting layers come into play.
Each object in Unity can be assigned to a sorting layer. Sorting layers are organized in a hierarchy, where layers at the top are rendered in back of layers below them. For example, you might have a “Background” layer at the bottom, followed by a “Foreground” layer, and then a “Character” layer on top.

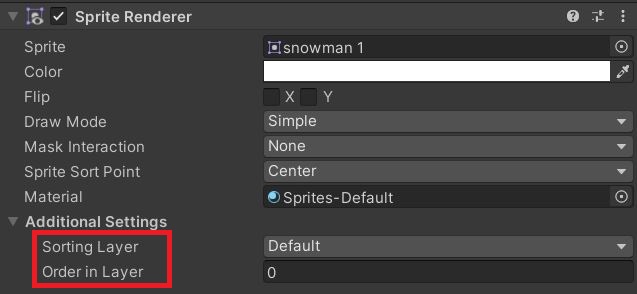
Order in Layer
Within each sorting layer, you can further assign a sorting order value to objects. Objects with higher sorting order values, are rendered in front of objects with lower sorting order values within the same sorting layer. This allows you to fine-tune the order of objects within a particular layer.
You can set the sorting layer and the order in layer value inside the sprite renderer component.
Creating a new Sorting Layer in Unity
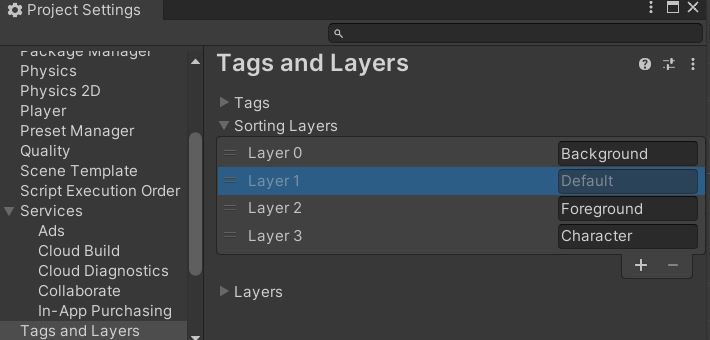
You can add any number of sorting layers as you wish. To create a new sorting layer, go to Edit>Project Settings>Tags and Layers.
Expand the Sorting Layers section and click on the + sign to add a new layer. The layer on the top is drawn at the back. You cannot delete the default sorting layer but you can reorder it.
Sorting layers demo
Let’s add some 2D sprites to our scene and see the sorting layers in action. Let’s add a background image, some platforms and a character to our scene. Here is how the scene looks without any sorting layers. One of the platform is hidden behind the background image.
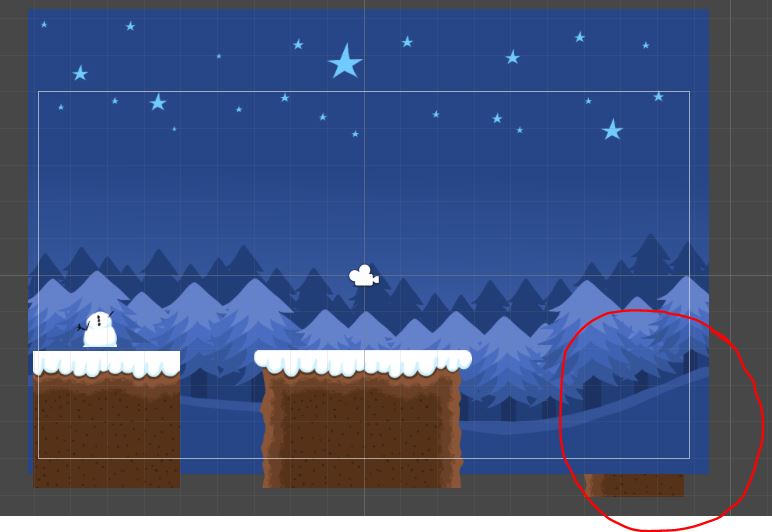
Also, if the snowman falls from the platform, it goes behind the platform. We want it to be in the front.

Now, let’s set the sprites to the sorting layers that we created earlier.
- Background image to Background layer.
- Platforms to Foreground layer.
- Snowman to character layer.
Here is how the scene looks like after setting up the sorting layers.

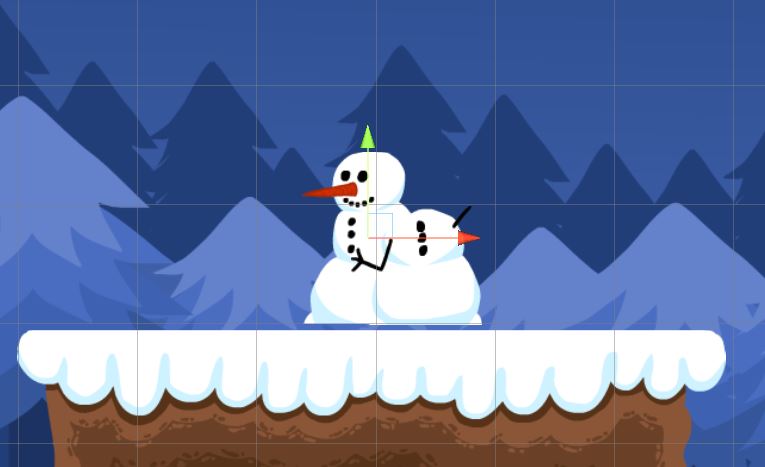
Now let’s add another snowman to the Character layer.
The new snowman is rendered in front of the already existing snowman. We want the new snowman to be behind the old snowman.
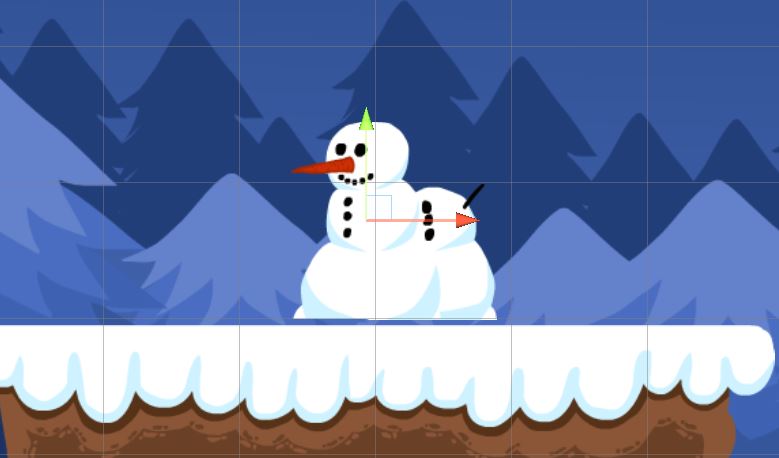
Since both the snowman are in the same sorting layer, we can use the order in layer, to render the new snowman behind the old one.
By default, the order in layer of all the renderers are set to 0. Let’s set the order in layer of the new snowman to -1. Since the old snowman order is higher than the new one, we should see the old snowman in front.
You can also use the sorting layers to create a parallax background in Unity.
Setting sorting layers using script
Unity allows you to set the sorting layer using script by accessing the renderer component. Even though the sorting layers property is exposed only in sprite renderer, we can set this property for other renderers too using script.
Let’s set the sorting layer of the background image to Foreground using script.
- Create a new script called “LayerTest” and add it to the background image.
- Open the script for editing.
- Get the sprite renderer component using
GetComponent<>. - Assign the sorting layer as shown in the script below.
using UnityEngine;

public class LayerTest : MonoBehaviour
{
    SpriteRenderer ren;
    // Sorting layer set to Foreground
    void Start()
    {
        ren=GetComponent<SpriteRenderer>();
        ren.sortingLayerName="Foreground";

    }

}
You can also set the sorting layer using the Id or the layer number in the sorting layers. The Foreground layer is the 3rd layer. You can see that by going to Edit>Player Settings> Tags and Layers.

Here is how to do it using code.
using UnityEngine;

public class LayerTest : MonoBehaviour
{
    SpriteRenderer ren;
    // Sorting layer set to Foreground which is the 3rd layer
    void Start()
    {
        ren=GetComponent<SpriteRenderer>();
        ren.sortingLayerName=SortingLayer.IDToName(3);

    }

}
That’s it for this tutorial. If you have any other questions on sorting layers, feel free to leave a comment below.