You may lose your Unity project files due to a hardware failure or by messing up yourself. To avoid this, you can either have backups on multiple devices or have a cloud backup. Even then, you will need to save multiple versions of your project files and have to maintain it. To make things simple, you can use a version control software like Git.
What is version control?
Version control is a way to track the changes done to the project files throughout the work flow. It is commonly used for software development when working with large teams. A basic version control software provides you with a history of modifications, along with the files to roll back to the previous version.

Version control is very useful when working with a team as everyone in the team will have a local version of the software. But it can also be useful for individual developers as a way to back up their project files in case they screw up something.
About Git and GitHub
Git is a version control system that was created by Linus Torvalds in 2005. It has become one of the most widely used and powerful tools for managing version control in open-source software development and other collaborative projects. Git is open-source and can be installed on various operating systems, including Windows, macOS, and Linux.
Git uses web-based platform for hosting versions online. GitHub is one such platform. GitHub provides hosting for Git repositories and offer additional collaboration and project management features, making it easier for teams to work together.
To use Git with Unity for version control, we need to follow the steps below
- Installing git on your local machine.
- Create and initialize a new repository for your Unity project.
- Commit changes to the repository when needed.
- Push the repository online and pull repository to revert back.
We will go through these steps one by one in details but before that you should understand the terms used.
- Repository: A repository, commonly referred to as “repo,” is a directory or folder that holds all the files, directories, and version history of a project managed by Git.
- Initialize (git init): To create a new Git repository for a project, you need to initialize it. Initializing a repository is used to turn a regular directory into a Git repository.
- Commit (git commit): A commit in Git represents a snapshot of the changes made to the project at a specific point in time. When you make changes to the files within the repository, you need to commit those changes to save them in the version history.
- Push (git push): Pushing in Git refers to sending the local commits from your repository to a remote repository (like GitHub).
Installing git on your local machine
Before installing GitHub for desktop, you need to create an account with GitHub. After that head to the download page and download GitHub for desktop.
Just double click on the downloaded file and install GitHub for desktop. The installation is fairly simple and will get over in seconds. After the installation you should see the initial window as shown below.
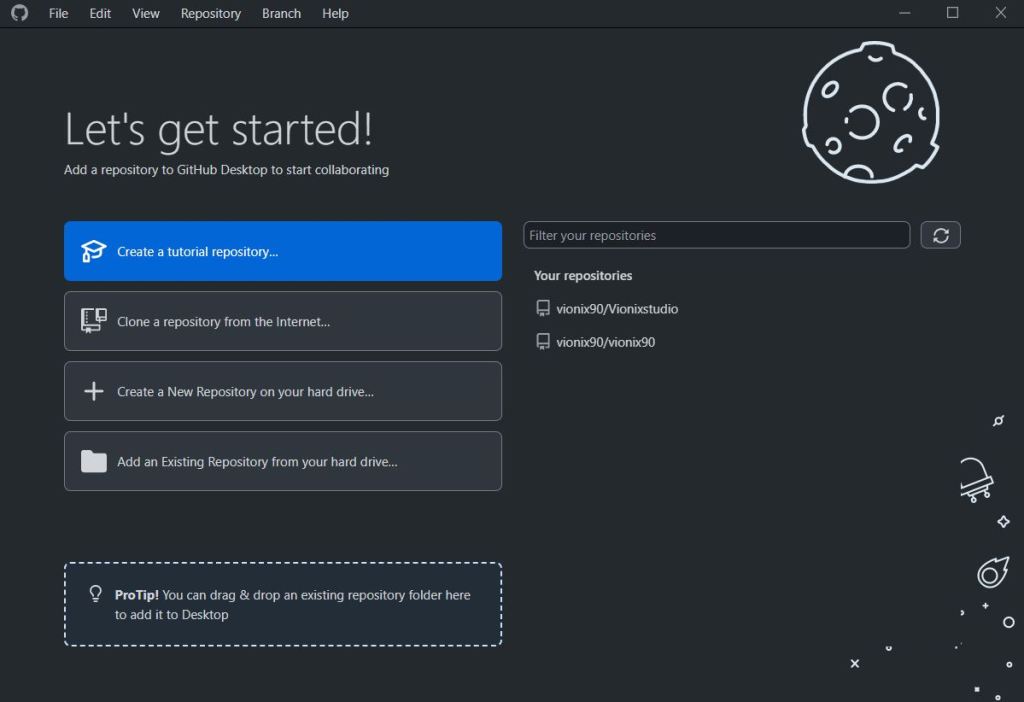
If you are not already logged in, it will prompt you to log in into GitHub. Log in and you are good to get started.
Create and initialize a new repository for your Unity project
If you have not created your Unity project, first go ahead and create your Unity project. After you have your Unity project, click on “Create a New Repository on your hard drive” button on the GitHub for desktop window and follow the steps below.
- Give a name, description and select the path to your Unity project.
- Check the “Initialize this Repository with a README” option.
- Select Unity in the Git ignore dropdown.
- Click on Create repository.

Git creates a folder inside our Unity Project folder with the repository name to save the git files. We want these files on the root Unity project folder. So, move the git files to the root of the Unity project and delete the folder with the repository name.
Now GitHub for desktop should give you an error stating “Cannot locate repository”. Click on the locate button and select the Unity project folder where you moved the git files. Now all your Unity files should be displayed.

Commit Unity project files
Whenever you make a change to a file inside your Unity project, it will be shown in the Changes tab inside GitHub for desktop. Initially all the files will be shown under as changed, so you will have to commit all the changes to the master.
To commit a file, enter a summary for the change and press the Commit to main button. This might take some time depending on the size and number of files.

Once the initial commit is done. You can test by saving a new scene in Unity and see if the changes are reflected here.
Whenever you commit a new change, it is logged under the history tab and you can see what changes were made.

Push and pull Git repository online
To save these data online, you can push the repository to GitHub. GitHub for desktop will create a repository for the same name on GitHub and every time you commit you can also push the data to GitHub. This way you will be able to secure your data even if the local machine data is lost.
Similarly, if you login into a new machine you can use pull origin to pull the data from GitHub online repository.
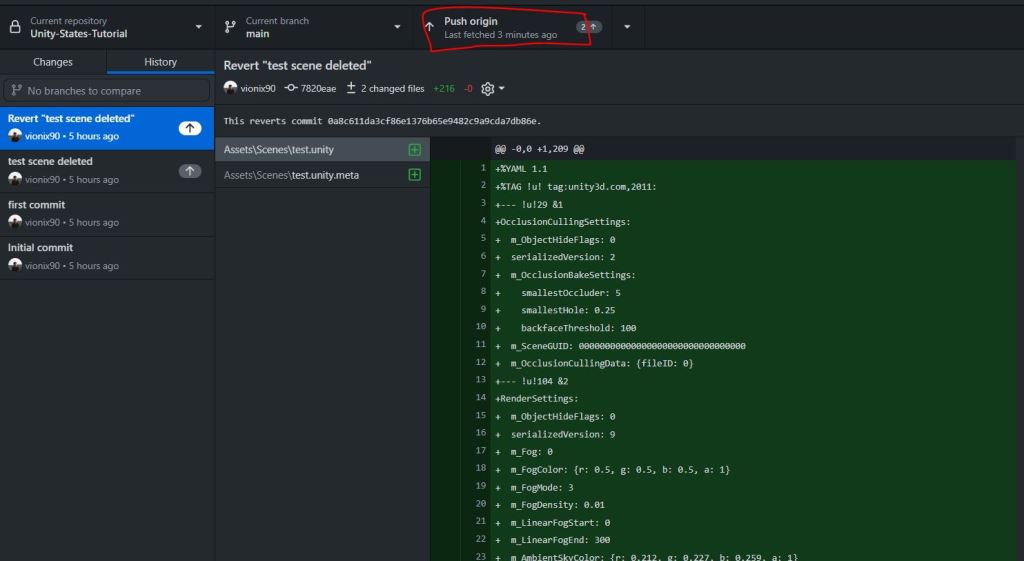
To revert the changes made in a commit, just select the version from history, right click and select “Revert Changes in Commit”.
That’s it. Now you know how to use git for version control in Unity. We will talk about large file issues in our next version control tutorial, until then try this out and let us know if you have any questions.