Unity’s particle system is very effective way to create visual effects, but is limited by performance. To overcome this limitation, Unity released the VFX graph (Visual Effect Graph) package to unleash the power of visual effects inside Unity engine. VFX graph is very effective at creating stellar looking visual effect at low performance cost. In this article, we will learn how to setup the VFX graph, how to use it to create a basic fire effect and how it differs from the particle system.
VFX graph works on with URP and HDRP render pipelines. Full support for the URP and compatible mobile devices is still in development. If you are using the built-in render pipeline, you have to use the particle system for visual effects.

Installing VFX graph
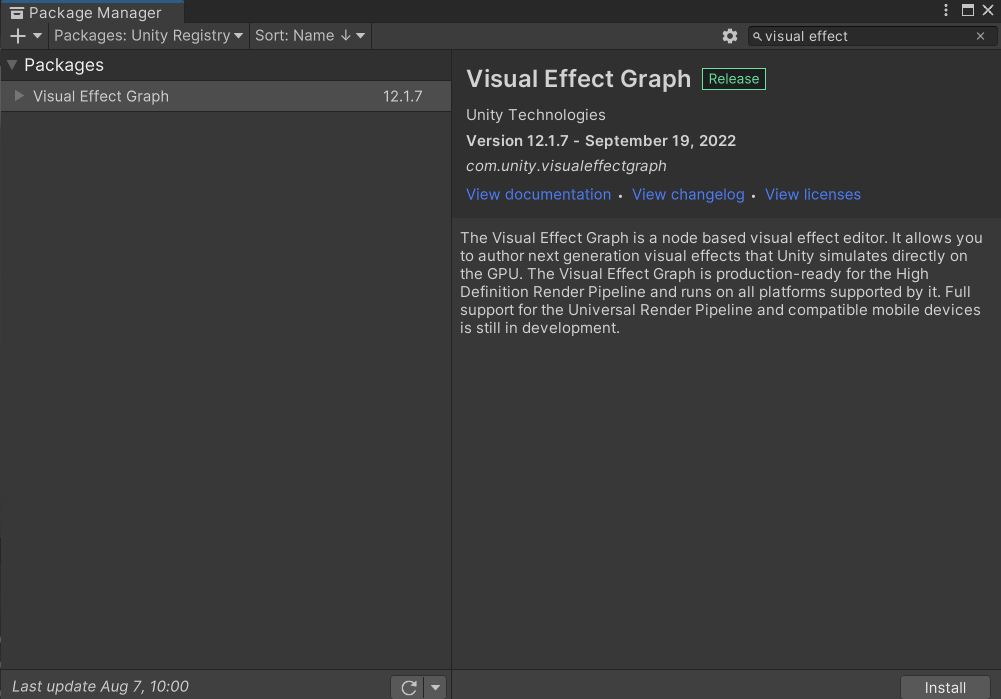
VFX graph is not added by default to all Unity projects. So, the first step is to install it via the package manager. Follow the steps below to install the visual effect graph.
- Go to Windows>Package Manager and select Packages: Unity Registry from the drop down.
- Search for Visual Effect Graph.
- Select it and click on Install.
- Import the samples if you want to preview them.
This should take some time and visual effects graph package will be installed.
Creating a new VFX Graph
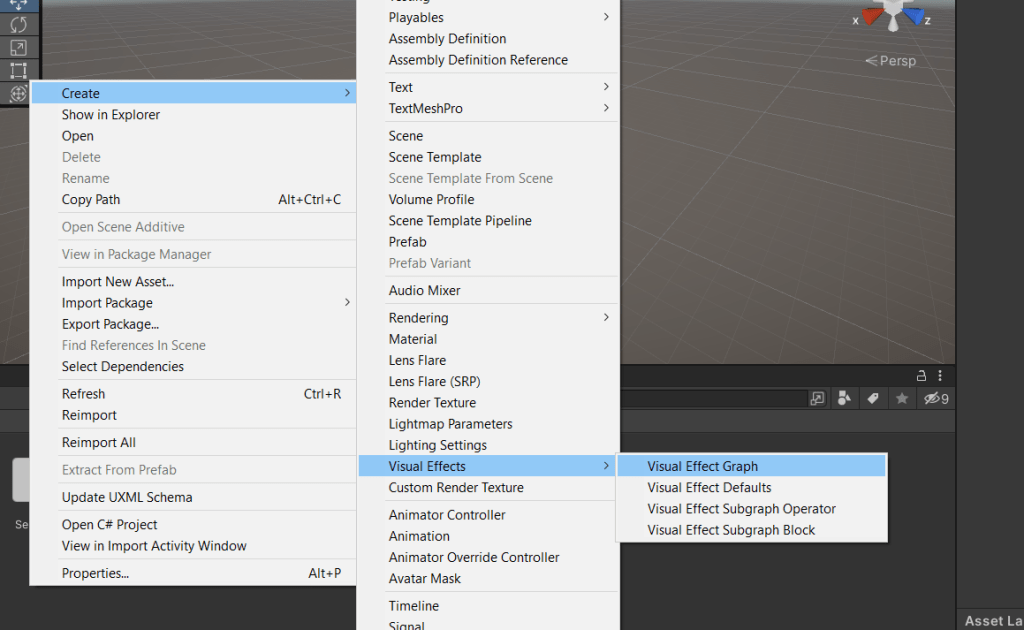
To create a new VFX Graph, right click on the project window and go to Create>Visual Effects> Visual Effect Graph.
This creates a VFX Graph, but does not add it to the scene. You need a VFX game object to add the VFX graph to the scene. Go to the Hierarchy window and click on the + sign>Visual Effects>Visual Effect. This adds a game object with a Visual Effect component. Under the Asset Template property, you can add your VFX graph.
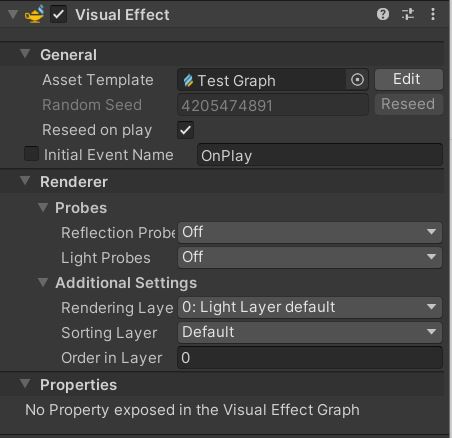
Remember that the VFX graph and VFX game object are two different things. This is very similar to Unity Animation where you need an Animator component to play animation clips.
Understanding the basic component of Unity VFX Graph
To edit a VFX graph, just double click the VFX graph and this will open the graph editor. Here is how the basic VFX graph editor looks like.

By default, a new visual effect graph contains a single particle system with Spawn, Initialize Particle, Update Particle and Output Particle Quad modules. You can add multiple particle system inside a single VFX graph if you want. As of now we will see what these modules do.
- Spawn: The Spawn module in the Visual Effects Graph is responsible for controlling the rate at which new particles are created. This can be based on a constant value, a curve, or even a random range. The spawn rate can be adjusted to create different visual effects, such as bursts or continuous streams of particles.
- Initialize Particle: The Initialize Particle module sets the initial properties of the particles when they are spawned. This includes properties such as position, velocity, size, color, and lifetime. You can also apply various modifiers, like gravity, with the option to scale or disable it using the Gravity Multiplier value.
- Update Particle: The Update Particle module is responsible for updating the particle properties over time. This includes updating the particle’s position, velocity, color, and size based on the applied forces, such as gravity, and other properties like age and lifetime. You can also use custom logic to modify particle properties, creating unique and complex effects.
- Output Particle Quad: The Output Particle Quad module is responsible for rendering the particles on the screen. It generates quads (2D rectangles) for each particle, which can be textured and shaded to create the desired visual appearance. The quads are aligned to the camera or a custom direction, and their size, color, and transparency can be adjusted based on the particle’s properties and lifetime.
Creating a simple Fire using VFX graph
Now that we understand the basics of VFX graph in Unity, let’s try to create a simple fire using it.
- Create a new VFX graph and name it as Fire_graph.
- Add a Visual Effect game object to the scene and rename it as Fire.
- If not already assigned, assign the graph to the visual effect component attached to Fire.
- Now double click the VFX Graph to open the graph editor.
- Arrange the windows in a way so that you can see the graph editor and the scene view. This way you can live preview the changes you make. Here are how my windows are arranged.

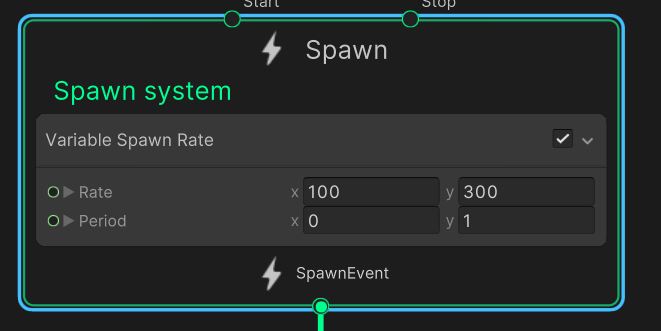
- Select the constant spawn rate block inside the spawn module and delete it. Right click on the spawn module>select Create Block and search for Variable Spawn Rate block.
- Set the spawn rate between 100 and 300
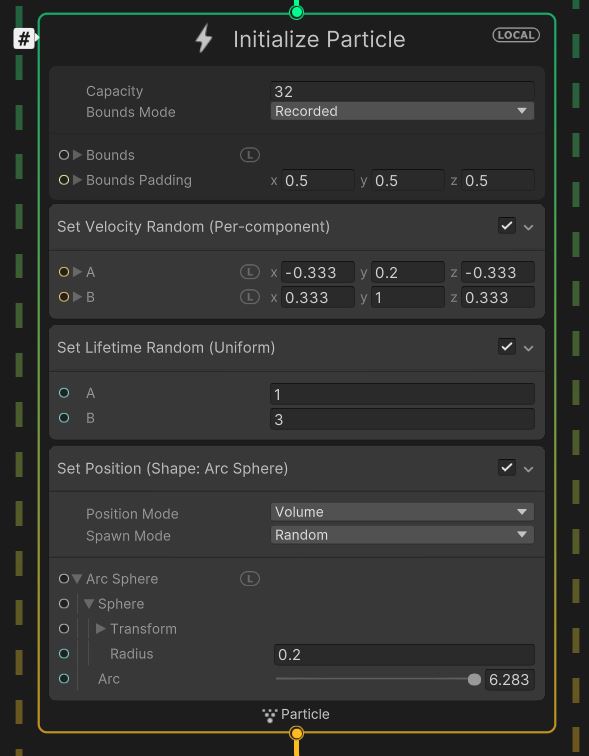
- Under the Initialize Particle module, we are going to set the size of the particle and shape of emission. Since the upward velocity and particle lifetime blocks are present by default, we will not change it.
- Right click on the Initialize Particle module and add a Set Position (Shape: Arc Sphere) block.
- Set the Radius of the sphere to 0.2 and position mode to Volume.
- Set the capacity option (this might not be available in older VFX graph versions) to something higher than 150.
- Under the Update Particle module, add a block to increase the velocity of the fire particle every frame.
- The block is called Add velocity. Set the value to 0.002 in the Y axis.

- Under the Output Particle Quad module, set the blend mode to additive and the main texture to Simple Smoke.
- Under Set Size Over Life block, set the initial size to 0.5, center point to 1 and the end to 0.3.
- Under Color Over Life block, set the initial color to bright yellow with an intensity of 4 and the end color to a mix of yellow and orange. Also reduce the alpha of the color towards the end.
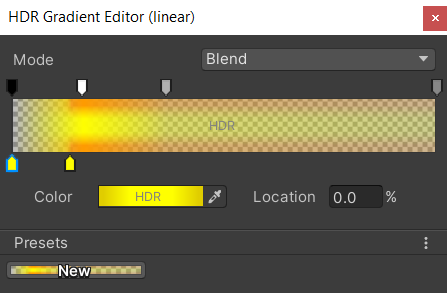
- Set the Color mapping parameter to Gradient mapped. This will even out the color over lifetime and make it look good.

Now select all the modules and right click. Then select Group Selection and name it as Fire. Copy and paste all the modules and name it as smoke.

Set the color mapping to default and blend mode to alpha for the smoke. Change the color to dark grey. Set the velocity so the smoke is going higher than the fire.
The Smoke particle would be in front of the fire, which we don’t want. Select the Quad module and right click. Select Name context. This allows you to add a name to the module. Let’s name the quad as smoke quad and do the same for the fire quad.
Now select the fire VFX graph and go to the inspector properties. Under Output Render Order, move the smoke quad to the first place. Go back to the VFX graph editor and save the graph. Here is how the final result should look like.
You can play around with the settings and make it even better. That’s it for the basics of Unity VFX graph, now let’s try to understand the difference between VFX graph and particle system.
Unity Particle System vs VFX Graph
You can achieve the same visual effect using both particle system and the VFX graph. The major difference comes in the performance as VFX graph is GPU based and particle system is CPU based.
Performance:
Particle System:
- The Particle System generally performs well for simple to moderately complex effects, but its performance can degrade with a greater number of particles or when using complex features like collision and sub-emitters.
- Particle System is CPU-based, which may limit the performance for large-scale effects.
Visual Effect Graph:
- The Visual Effect Graph is designed for high-performance effects, as it’s GPU-based and can handle millions of particles efficiently.
- The performance of the Visual Effect Graph can be optimized further using features like culling, LOD, and asynchronous simulation.
Use Cases:
Particle System:
- Ideal for projects that require simple to moderately complex effects like smoke, fire, sparks, and explosions.
- Suitable for projects targeting lower-end hardware or mobile devices where performance is a priority.
- Great for prototyping and quickly iterating on visual effects.
Visual Effect Graph:
- Best for projects that require highly complex, large-scale, or interactive effects, such as large-scale explosions, environmental effects, or advanced character effects.
- Suitable for projects targeting high-end hardware, consoles, or desktop platforms where more advanced visual effects are desired.
- Can be used for creating effects that interact with specific elements like depth buffer, color buffer, or other scene data.
The choice between Particle System and Visual Effect Graph depends on your project’s performance requirements and the complexity of the effects. Particle System is suitable for simpler effects and projects targeting lower-end hardware, while Visual Effect Graph excels in handling complex, large-scale effects on high-end platforms.
That concludes our tutorial on getting started with VFX graph in Unity. If you have any other question, feel free to leave them in the comment box below.