
In our last tutorial, we saw how to get started with VFX graph in Unity and how to create a simple fire effect. Now let’s take it up a notch and try to create a slightly difficult visual effect. In this tutorial, we will create a portal effect in Unity using the VFX graph.
Just to make things clear, Unity’s VFX graph will work only on URP and HDRP pipelines. If you are using the standard render pipeline, you should use Unity’s particle system to create visual effects.

Now let’s get started with the portal effect.
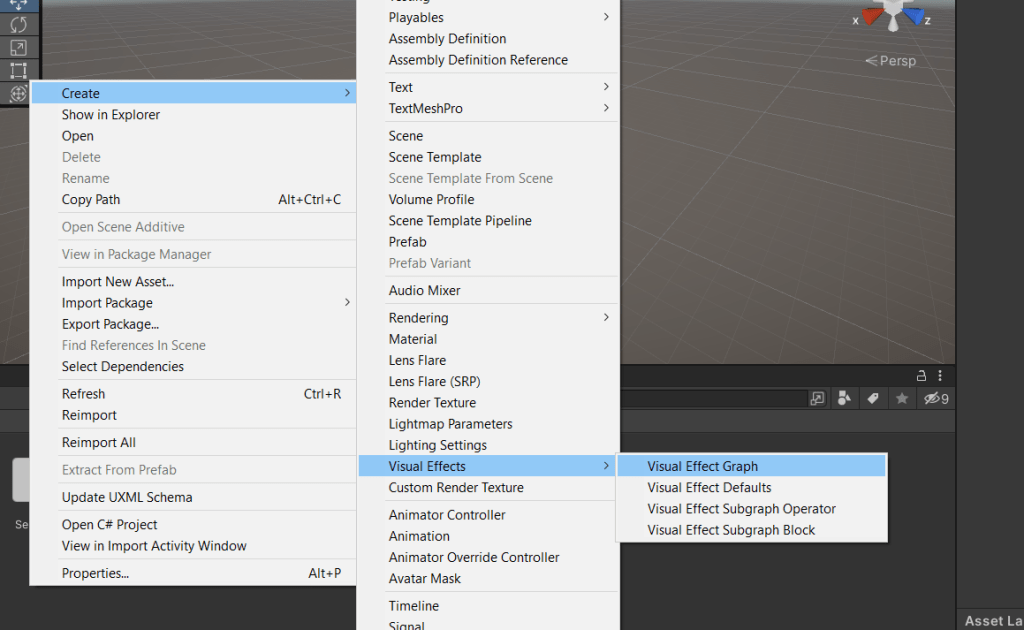
Creating a New VFX Graph
- Go to the project window, right click and navigate to Create>Visual Effects> Visual Effect Graph.
- Rename the VFX graph to Portal_Graph.
- Go to the Hierarchy window and click on the + sign and navigate to Visual Effects>Visual Effect to add a new visual effect game object.
- Assign the VFX graph to the visual effect game object.
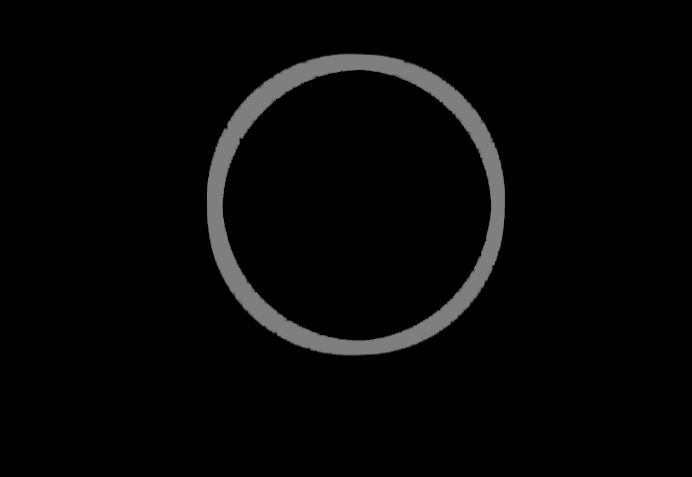
Spawn Particle in Circular fashion
- Double click on the VFX graph to pen VFX editor.
- Delete all the components to start fresh.
- Press space bar and search for empty particle system and add it.

- Under the spawn module, add a constant spawn rate block and set the spawn rate to 1000.
- In the Initialize Particle module, set the capacity to 1000 and add a Set Position (Shape: Arc Circle) block. Now you should see a circular shape in your scene view.
- Add a set lifetime random block and set the values to 0.1 and 1.
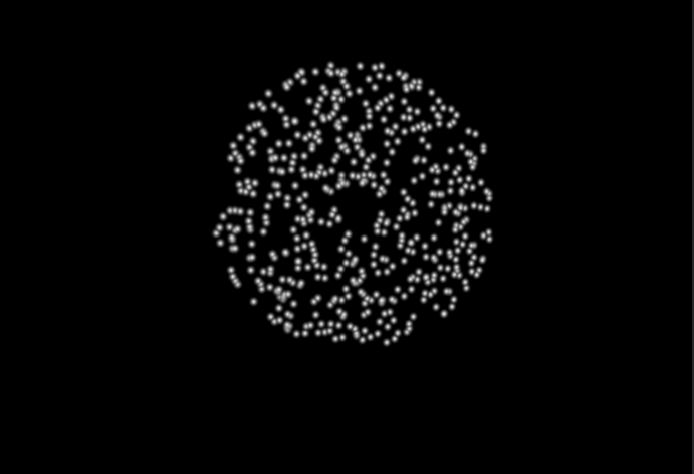
Move the particle towards the center
We want the particles to move towards the center to get the portal effect. For that we will use the “conform to sphere” block inside the update module.
- Right click on the update module and add the Conform to Sphere block.
- Set the radius to 0.1, Attraction Speed to 1 and stick force to 10.
- Now your particle should start moving towards the center.
- Under the Output squad module, set the main texture to default particle.
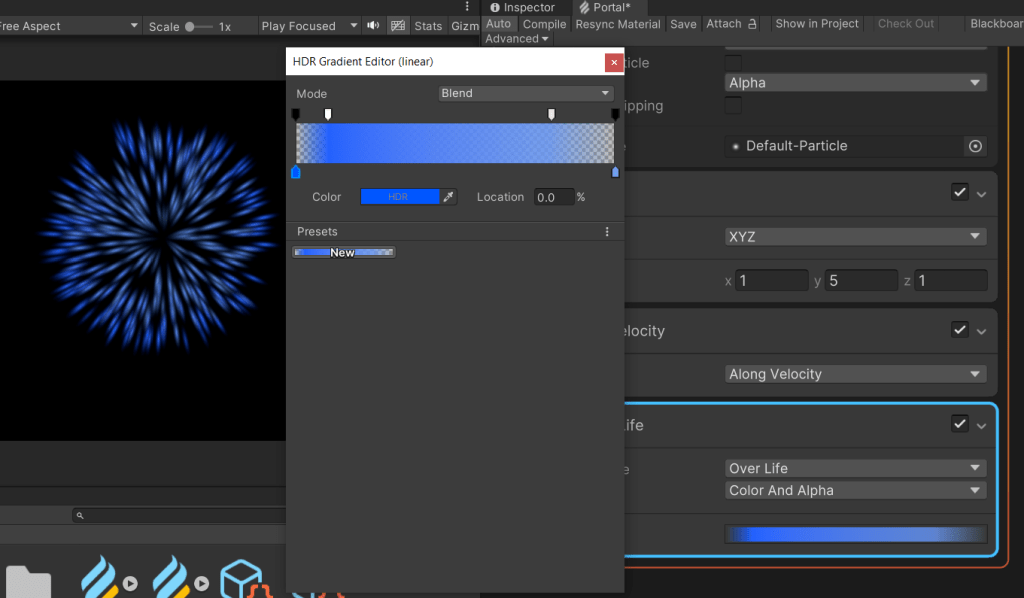
Making the Particle look elongated
- Add a set scale block to the quad module.
- Set the scale along y axis to 5.
- Add an orient along velocity block. This will align the particle in the direction of motion.
- Now you should have a cool worm hole effect.
- Add a color over life time block and set the initial color to blue and the end color to whitish blue.
- Also set the initial and end alpha values to zero and set them to 255 in between.
- You can set the color mapping property under quad module to Gradient Mapped get some different color effects.
Creating the ring around the portal
For this we will be using an in-build system inside Unity VFX graph and modifying it.
- Press space bar and search for Simple heads and Sparks system.
- Now you will see two initialize particle modules and two update particle modules. One is for the base particle and the other is for the trails.
- Remove the velocity block from the initialize particle module on the left and add a Set Position (Shape: Arc Circle) block.
- Set the radius equal to the one we used earlier.
- Set the spawn rate and capacity to 200.
- In the initialize particle module on the right side (under the GPU event), change the lifetime to 0.1 to 1.
- Under the Update particle module add a force block after the turbulence block.
- Set the force value in z axis to 2 and 0 in all other axis.
- In the turbulance block, set the frequency to 5 and octaves to 3.
Here is how our final portal should look like.

If you are having any trouble or your portal does not look like this, feel free to leave a comment below.