Playing an audio clip with visual scripting is as simple as playing audio using code in Unity. You can better control on playing audio with code but if you are going to just click play then visual scripting is the easiest one. In this tutorial, we will play an audio clip after 10 second’s delay.
I am using Unity 2021.1.13 for this tutorial.

Adding components
- Create an empty game object and name it audio_object.
- Add a Script Machine component and an Audio Source component.
- Add your audio clip to the Audio Source component.
- Uncheck Play on Awake on the Audio Source.
- Click new on the Script Machine to create a new flow graph.
- Let’s name it Audio_player.
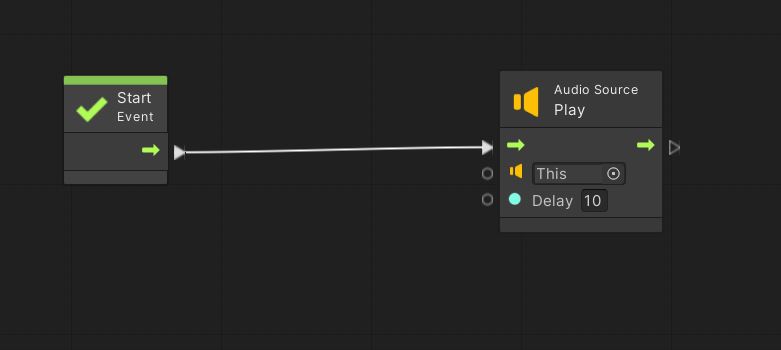
Creating the flow graph
- Click edit graph.
- Add an Audio Source:play(delay) object.
- Enter 10 in the delay input.
- Connect the start event to the Audio Source object.
That’s it you have created a logic to play an audio clip after 10 second’s delay.
Cool. I spent a long time looking for this. I think my thesis can be completed more smoothly. Thank you.