In recent times, after the announcement of new pricing plan by Unity, many developers are looking to switch to Godot. Godot being free and easy to use is the first choice for most indie game developers. In this article, we will compare all aspects of Unity and Godot starting from installation to building a game. If you a Unity developer, looking to switch to Godot, then this guide will give you a crash course on basics of Godot.
Installation
To download and install Unity, you have to follow the following steps

- Download Unity Hub.
- Install Unity Editor and all the required components.
The total installation size for basic Unity editor and Code editor would be around 4GB or more.
To Install Godot, you need to download a zip file and extract it. That’s it, you can run the exe and get going.
The zip file is around 60MB.
Starting a New Project
To start a new project in Unity, you need to use the Unity Hub to select a template, give it a name and click on start. Unity takes around 2 to 10 minutes to load a new project.
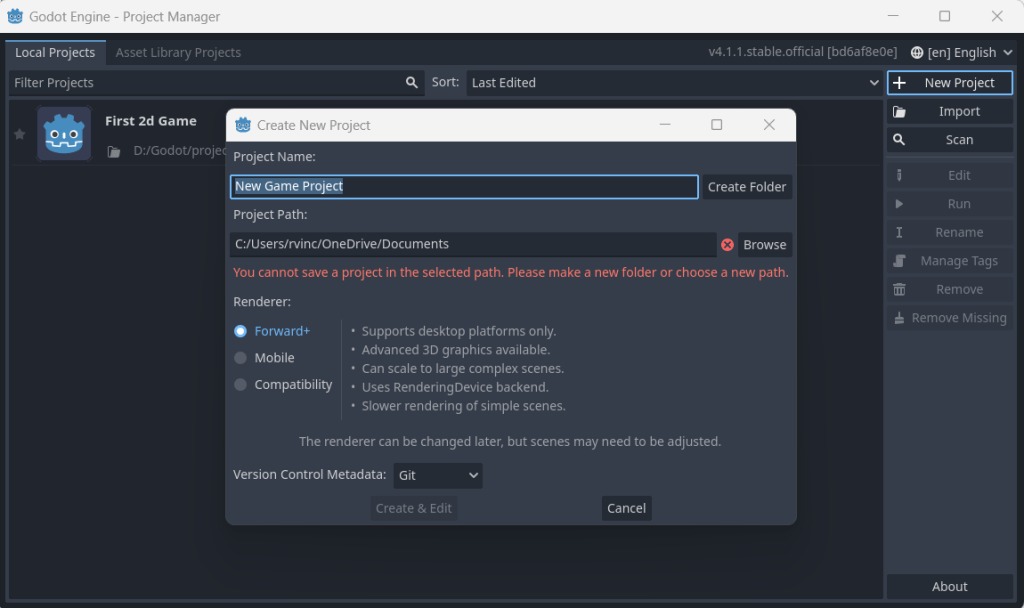
In case of Godot, run the application that you downloaded and click on New project. Give it a name and select the renderer. Click on Create & Edit and your new project should open up within seconds.
Godot is way faster than Unity when starting a new project.
Workflow when creating a game scene
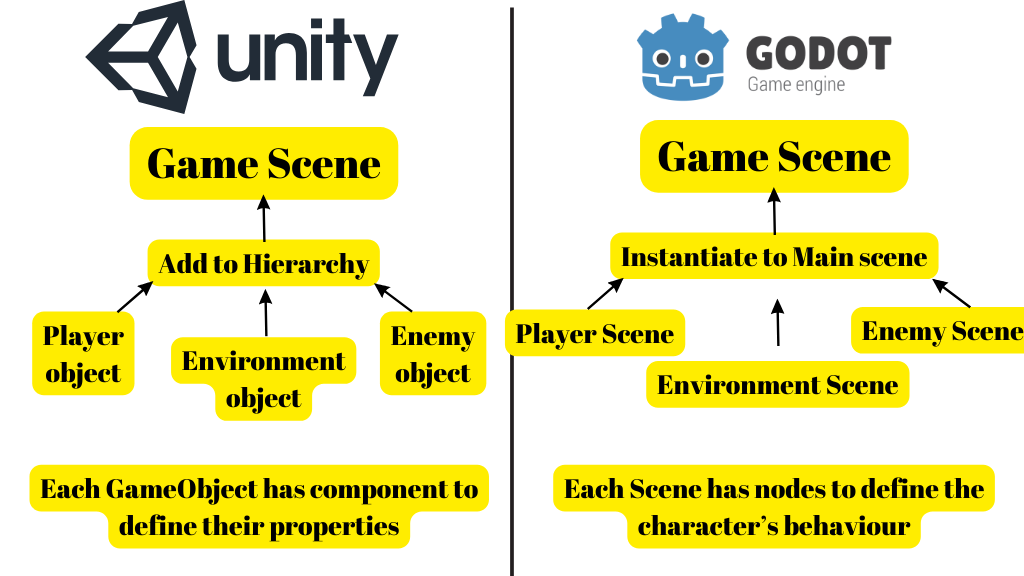
Unity Workflow:
- Scene-Centric Design: In Unity, the primary focus is on scenes. Game objects are added to scenes, and these scenes represent different parts of your game or levels. Each scene can contain a combination of 2D ,3D and UI objects.
- Component system: Unity uses a component-based architecture. Each game object in a scene can have multiple components attached to it, such as scripts, colliders, renderers, and more. These components define the behavior and appearance of the game object.
- Prefab System: Unity also has a prefab system, allowing you to create reusable templates of game objects. Prefabs make it easy to maintain consistency across multiple instances of an object.
- Scene Management: Transitioning between different parts of the game, such as levels, is managed through scene loading and unloading. Each level or section of the game is usually represented as a separate scene.
Godot Workflow:
- Node Design: Everything in a Godot game is represented as nodes, which are organized in a tree structure. Each node can represent a character, level, UI element, or any other game entity.
- Scene Composition: In Godot, each character, level, or UI element is typically created as a separate scene. These scenes can be added as child nodes to other scenes, forming a hierarchy. For example, a character scene might be added to a level scene to create the character within that level.
- Scene Instancing: Instead of prefabs, Godot allows you to instantiate scenes. You can create instances of a scene within other scenes, making it easy to reuse and combine various elements, just like prefabs in Unity.
- Scene Switching: Transitioning between different parts of the game is often managed by loading and unloading scenes, much like Unity. However, Godot’s scene system is closely tied to its node system, making it seamless to work with scenes as nodes within the overall game structure.
Basic Functions
When you start scripting with Unity, Start and the Update are the very first functions that you see. Godot has two similar functions.
Start is called _ready() and Update is called _process(). The functions work in a very similar way when compared to Start and Update in Unity.
Here is how a new script looks like in Unity and Godot
Default Unity script
using UnityEngine;

public class UnityScript : MonoBehaviour
{
    // Start is called before the first frame update
    void Start()
    {
        // Initialization code that runs once at the start of the game or when the object is instantiated.
    }

    // Update is called once per frame
    void Update()
    {
        // Update code that runs every frame.
    }
}
Default Godot GDScript
extends Node

# _ready() is called when the Node enters the scene tree
func _ready():
    # Initialization code that runs once when the node enters the scene tree.
    pass

# _process() is called every frame
func _process(delta):
    # Update code that runs every frame.
    pass
Components vs Nodes
If you want to create a physics body that detects collision in Unity, you add a Rigidbody and a collider component to the game object.
In case of Godot, every character has its own scene. So You need to create a new scene with Kinematic node as the root node. You can rename that to your player. Any further properties like collision needs to be added as a child node to the root node. Here is an example physics character with collision detection.
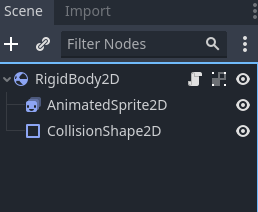
Node Signals
Every node in Godot has some predefined signals that they emit based on certain conditions. You can find it under the Node tab near the inspector tab. These signals can be used to trigger custom functions. For example, in the below image we are using the mouse_exited() signal and connecting it to _on_mouse_exited() under the Receiver method. Now when ever the mouse exists the Rigidbody2D, this function will be called.

These where the basics required to switch from Unity to Godot. If you have any other questions regarding this, or if you want us to make specific Godot tutorials, let us know in the comment box below.