Unity is one of the most used game engines by new developers. Like every other software Unity also requires proper setup and installation. Over the years Unity has made it simple to install and start your first game. Let’s take the first step in learning Unity by installing it.
Recently Unity has introduced Unity hub, to allow multiple versions of Unity to be installed on a single computer. By default, Unity installation includes Unity hub.

Minimum system requirements
As per Unity documentation it is enough to have a computer with the supported OS. But, depending upon the game you are making the requirement to render the graphics may go up. We recommend the following basic configuration.
| Type | Min Requirements |
|---|---|
| Operating System | Windows 7 (SP1+), High Sierra 10.13+, Ubuntu 18.04, and CentOS 7 |
| RAM | At least 8 GB |
| Graphics | At least 4 GB, DX10 capable GPU |
| CPU | 64-bit architecture |
Steps to install Unity
Step1: Create a Unity ID
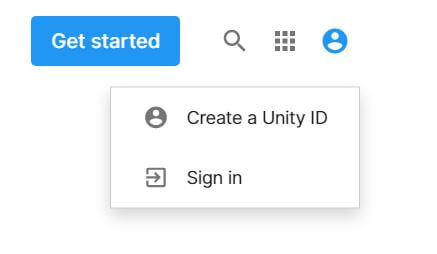
- Go to Unity Website and click on the account icon.
- Select Create a Unity ID.
- Fill in the details and click create.
- You will receive an email from Unity to confirm your email. Click on the link to confirm your email address.
Step2: Download Unity Hub
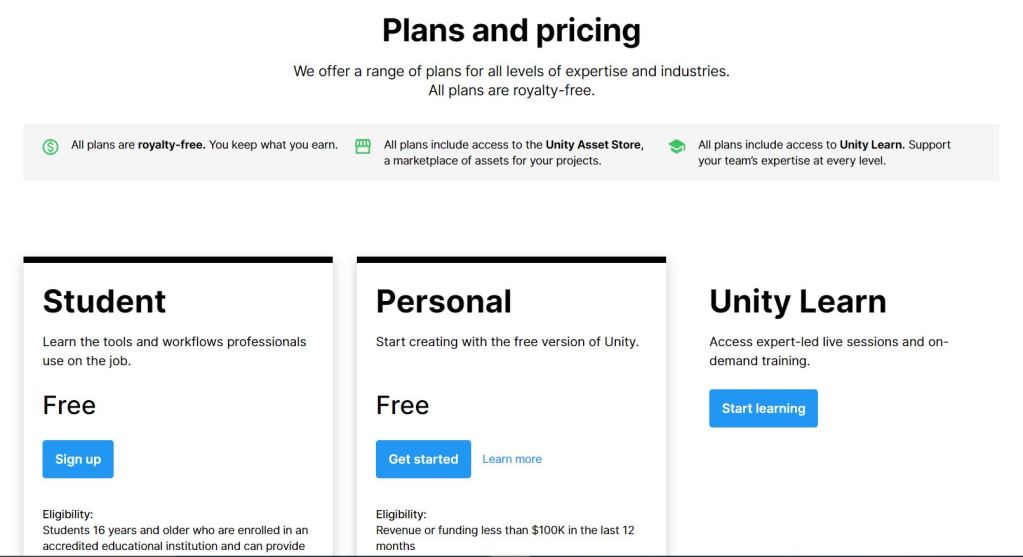
- Go back to Unity home page and click Get started.
- Scroll down to find Unity Personal option. Click on Start creating with Unity.
- This will take you the downloads page. Click on Download for windows to download Unity Hub.
- If you are an organization you need to buy Unity pro or plus.
Step3: Installing Unity Editor and Modules
- Run Unity Hub installation.
- Follow the on-screen instructions and complete installation.
- Run Unity hub, go to the install tab and Select Unity version to install.
- In the modules option, select Visual studio community and documentation. You can select other modules based on the platform you are going to launch your game on.
- Visual studio community is only required if you are developing application for windows. You can skip Visual studio community if you don’t need it and you can use Visual studio code as your code editor. Visual studio code is just 100MB compared to the 1.5GB download of Visual studio community.
- You can also install the modules at a later stage if required.

This will take some time and install both Unity and Visual studio. Now you can create a new project and start working on your game.