Unity works based on a component system. All game object’s characteristics are defined by the components added to it. For example, the position is defined by the transform component and the collision is defined by the collider component, which we came across in the learn Unity series earlier.
This component-based system requires a constant addition or removal of components to alter the behavior of the game objects. In this tutorial, we will see how to add a new component to a game object using script and also how to access and modify the existing components.

Adding component using script
Adding component to a game object during gameplay, is not the right way to write your code. Adding a new component takes up a lot of memory and if you frequently add or remove a component from a game object during gameplay, there will be performance issues. We will discuss on how to efficiently work with components in the later part of this tutorial.
Adding component to the same game object to which the script is attached.
The below script will check for the condition and will add a Rigidbody component to the game object.
using UnityEngine;
using System.Collections;

public class AddCompExample : MonoBehaviour
{
    void Update()
    {
      if(condition)
      {
       this.gameObject.AddComponent<Rigidbody>();
      }
    }
}
Adding component to a different Game object
The below script takes in a ball game object and adds a Rigidbody component, when the condition is true. You have to assign the ball game object in the inspector window.
using UnityEngine;
using System.Collections;

public class AddCompExample : MonoBehaviour
{
public Gameobject ball;
    void Update()
    {
       if(condition)
       {
         ball.AddComponent<Rigidbody>();
       }
    }
}
Remove a component using script in Unity
Unlike AddComponent, Unity does not have a remove component function. You can use the destroy function for this purpose. Be careful or you might end up destroying the whole game object or the script.
The below script gets the Rigidbody component using GetComponent and destroys it when the condition is true.
using UnityEngine;
using System.Collections;

public class removeCompExample : MonoBehaviour
{
    Rigidbody rig;

    void Start()
    {
     rig=this.gameObject.GetComponent<Rigidbody>();

    void Update()
    {
       if(condition)
       {
         Destroy(rig);
       }

    }
}
How to efficiently add or remove component
As we discussed above, adding or removing component during run-time will affect the performance of your game. So, how to go about it?
This is very similar to instantiating a prefab in Unity. The best way is to add the component in the editor and disable it. You can enable the component when required and disable when not required.
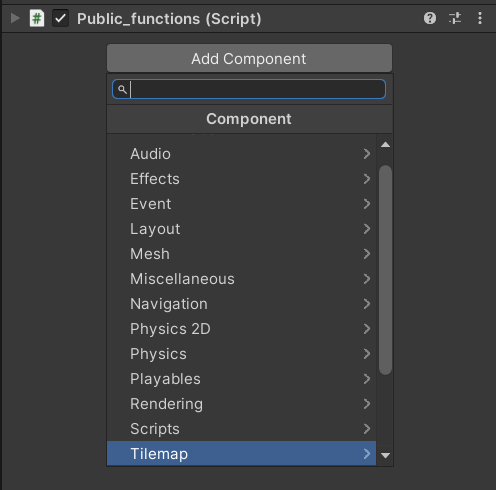
Adding a component using Unity editor
Select the game object and click Add component in the inspector window.
Enable and disable component using script
Get the attached component and then enable it when required. One thing to note here is, the GetComponent function works even with disabled components.
using UnityEngine;
using System.Collections;

public class enableCompExample : MonoBehaviour
{
    Rigidbody rig;

    void Start()
    {
     rig=this.gameObject.GetComponent<Rigidbody>();

    void Update()
    {
       if(component_required)
       {
         rig.enabled=true;
       }
       else if(component_not_required)
       {
         rig.enabled=false;
       }

    }
}
Hope this tutorial answered all your questions regarding adding and removing a component from your Unity game object. If you have any more questions, feel free to leave a comment below.
Next, we will learn about importing assets into Unity.